THIS POST MAY CONTAIN AFFILIATE LINKS FOR PRODUCTS THAT I PERSONALLY USE AND RECOMMEND. IF YOU MAKE A PURCHASE THROUGH ONE OF THESE LINKS, I WILL EARN A COMMISSION AT NO EXTRA COST TO YOU.
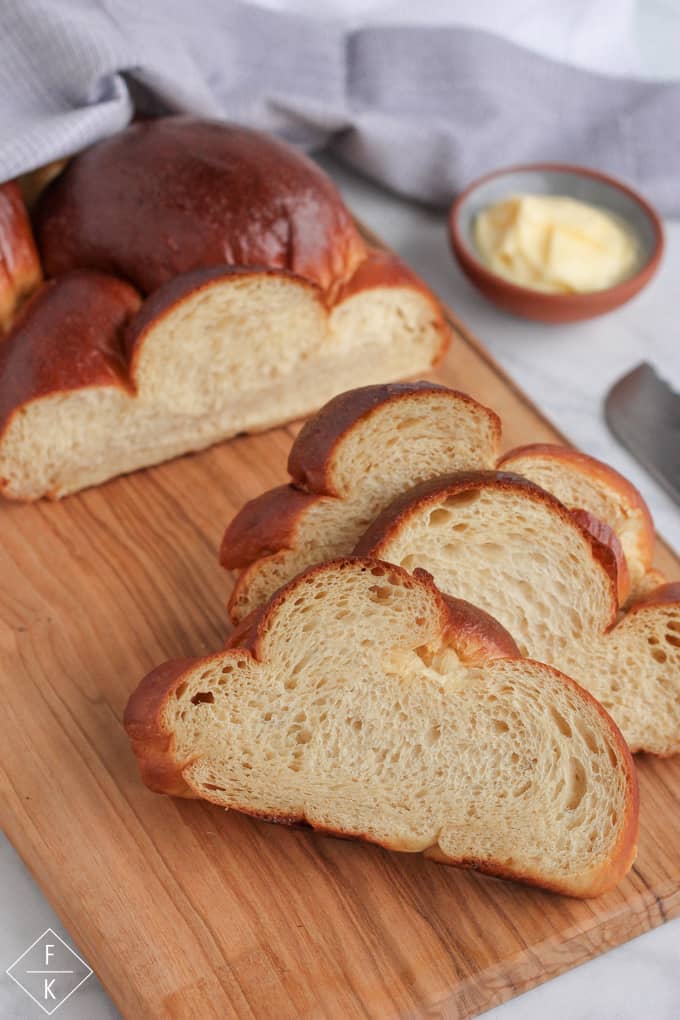
Wouldn’t it be nice to have a rich, beautiful, shiny and braided Challah Bread that you can serve to your friends and family, AND THAT YOU can actually eat too even when you’re eating LOW CARB?!? Now, you can because this is LOW CARB CHALLAH BREAD made with yeast!!!!! This challah is made with an enriched dough (very similar to my low carb brioche brioche dough) which has added eggs, fats, and sweeteners (a sugar-free one of course), resulting in a springy bread that tastes real, has a soft and supple interior and a lightly sweet taste. We use an egg wash to give it that classic shiny texture that will make your jaw drop. To make low carb challah bread , you will need to use a special blend of low carb flours, a sugar substitute, and a stand mixer with a kneading hook (or bread machine to knead). This post is loaded with details and instructions to ensure that even if you’re a newbie to breadmaking, you can MASTER this low carb dough at home too!
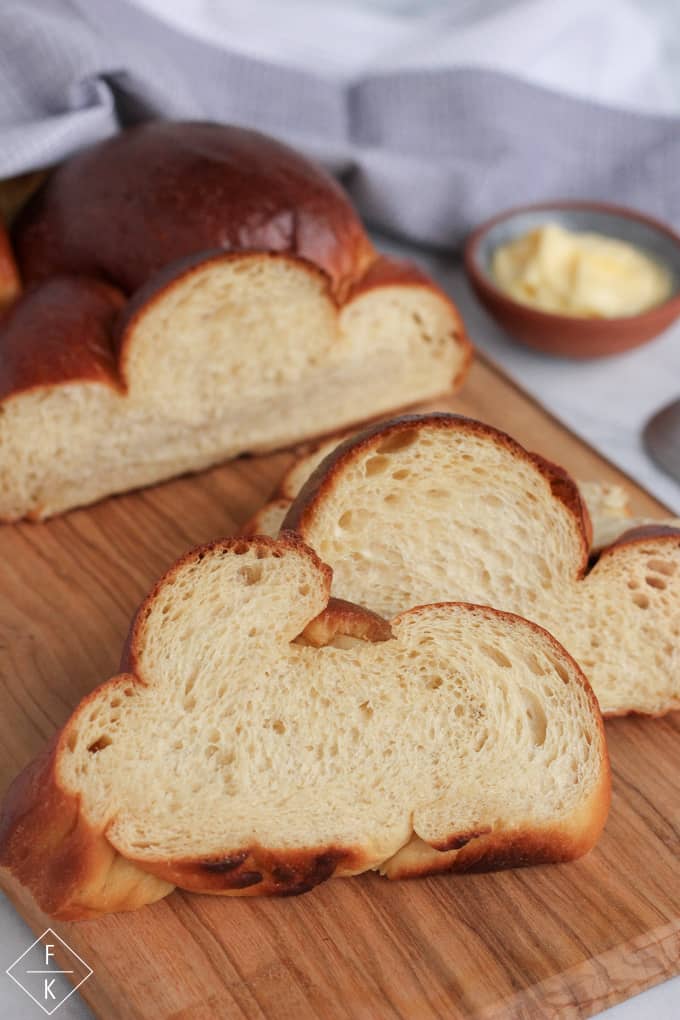
Now, what is Challah? Challah is a traditional Jewish Sabbath and holiday bread, although it can CERTAINLY be enjoyed YEAR ROUND. It is known for it’s jaw dropping braided appearance and shiny crust. Challah is an enriched dough, very similar to a brioche dough (brioche is an enriched bread dough with added eggs, butter, sometimes milk & sugar) but is made without any dairy products. Dairy is not used to make the Challah kosher (meaning , in accordance with Jewish dietary law). Unlike brioche, it uses oil to enrich the dough instead of butter, uses just water (and no milk), and requires using kosher salt. It also usually has slightly more eggs in it than a brioche, but technically doesn’t have to. 😉
When I finally mastered my Low Carb Brioche Bun Recipe (one of my most popular recipes on this blog!) earlier this year , I knew I was going to need to create a low carb challah recipe soon after. The dough’s are similar enough that I had confidence it would be an easy adjustment! Now that 2020 Hanukah is upon us, I finally got around to making my planned low carb Challah recipe adjustments to my brioche dough to test out my theory! It turned out to be a GREAT success, which is certainly not always the case in my low carb bread ventures (I think I’m on upward of OVERALL – ie. total running of all kinds of low carb bread* bread recipe test #75 🤣) ! My husband and daughter are the only people who TRULY know the truth of this, as they witness the behind the scenes of all my charming low carb bread recipe tests… you know, those experiments where it looks like a bomb went off in my kitchen, with powdery flour ‘substitutes’ all over my floor & on my face, my hair looking like Einstein’s, the counters scattered with calculators, thermometers, kitchen scales, measuring devices and notebooks covered in my chicken scratch with math equations and recipe notes written on them. Generally when my husband comes home from work to this beautiful scene, I either have a look on my face of failure (and a garbage bin full of mystery dough to prove it) a look of grand triumph, OR, a look of serious DETERMINATION (and usually more bowls and ingredients out becuase that means I’m probably already starting round 2 recipe test). In any case, THIS low carb challah bread One of the TRIUMPHANT experiments, ON THIS FIRST TRY!
Here’s how I came about adjusting my low carb brioche recipe to turn it into THIS low carb Challah recipe. 🙂 First, I added two egg yolks to the recipe. I didn’t want to add full eggs, because I was afraid of how the additional egg WHITE protein was going to affect the texture (low carb dough is FINNICKY already as it is, and small changes make big differences). The two egg yolks adds an additional nice & rich texture without sacrificing that beautiful soft crumb that I finally achieved in my final low carb brioche bun recipe. Eggs actually have quite a bit of water in them, so adding eggs meant that I ALSO had reduce the amount of water in the recipe because keeping the HYDRATION (ratio of total liquids to total ‘flour’ ingredients) the same is super important. Yolks are made up of only 50% water (whole eggs, in comparison, are made of 78% water). So I took the weight of the two egg yolks , multiplied by .5 (for 50%), and then subtracted that amount of water from the brioche recipe. 🙂 Additionally, I replaced the butter (which you don’t actually HAVE to do if you don’t want to!) to keep this Kosher and traditonal, with oil. Doing that means I also needed to add in just a few grams of water back in because butter is 16-20% water, with the amount depending on brand/quality of butter. 🙂 I also added a little more kosher salt, simply because there is more eggs in this recipe, and we need more salt to flavor it! And BAM, that was it, and it worked like a charm!
If you happen to follow me on Instagram and watch my stories (if you don’t you should!), you’ll know I have experimented, tested, adjusted, and FAILED COUNTLESS times on my creation quest of a REALLY GOOD low carb yeasted bread recipe…. Finding a healthy & low carb yeasted bread that is actually good enough to truly REPLACE and satisfy the lingering desire for that evil, energy sucking, addicting, pant-size increasing, CARBY thing they call bread, WAS LIKE A QUEST TO FIND REAL, FLYING, RAINBOW, UNICORN THAT TALKS. Sure, there’s lots of easy to make & decent tasting low carb substitutes that work for your pizza crust (Like fathead dough!), or as a vessel to hold your sandwhich ingredients, burgers, or PB & SF Jelly (like chaffles!), but there WAS NOTHING out there that would TRULY give me that oh so scrumptious, fresh, soft, yeasted nostalgia JUST LIKE real bread … Until I got down to business FINALLY made it in my own kitchen with that AMAZING Low Carb Brioche Bun Recipe! NOW that we have that, and NOW this low carb challah bread, I feel fairly unstoppable. Okay, not just from these two recipes, because they’re virtually the same – enriched doughs, BUT, ssshhhhhh…. I have a secret! I believe that I have ALMOST (almost is used only because I’m an annoying perfectionist ugh) MASTERED a REALLY legit low carb LEAN dough (meaning no eggs, no fats – just yeast, low carb ‘flours’, water, and salt). Once I have that 100% (its crispy finally on the outside, but needs a smidge MORE crispiness) then there really will be NO STOPPING ME (thats the magic mix that I need to master to ultimately make Low Carb BAGUETTES, some real DEAL low carb yeasted pizza crust, boules, artisan breads, sourdough, ciabatta, bagels, Croissants, and YEESH SOOO MANY THINGS
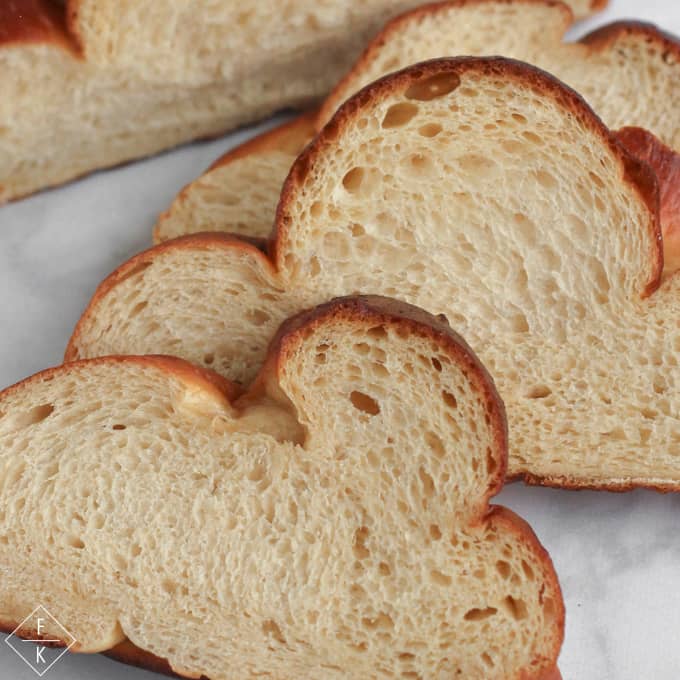
But, back to enriched low carb doughs like this low carb challah bread & my Low Carb Brioche Bun Recipe. Because….. do you know what else uses an ENRICHED low carb dough just like brioche and challah? ……. oh let me COUNT the ways, my friends!!!!!! …….. DONUTS. CINNAMON ROLLS. BABKA. BRIOCHE BREAD LOAVES. JAPANESE MILK BREAD. HAWAIIN ROLLS. SOFT BUTTERY DINNER ROLLS. CINNAMON RAISIN BREAD. PULL APART BREAD. MONKEY BREAD. ITALIAN EASTER BREAD. PANNETONE. PITA BREAD. FOCCACIA. FLATBREAD. SOFT SANDWHICH BREAD. HOAGIE ROLLS. HOT DOG BUNS. Need I go on? 😉 And YES, I plan on making a low carb version of EVERY single one of the above which will be easy peasy now that we have low carb brioche and challah bread MASTERED! As soon as I get the time to test those (HAAAA…. AS I LAUGH to myself…. What IS ‘HAVING FREE TIME‘ when you have a toddler? I’m not sure I really even know).
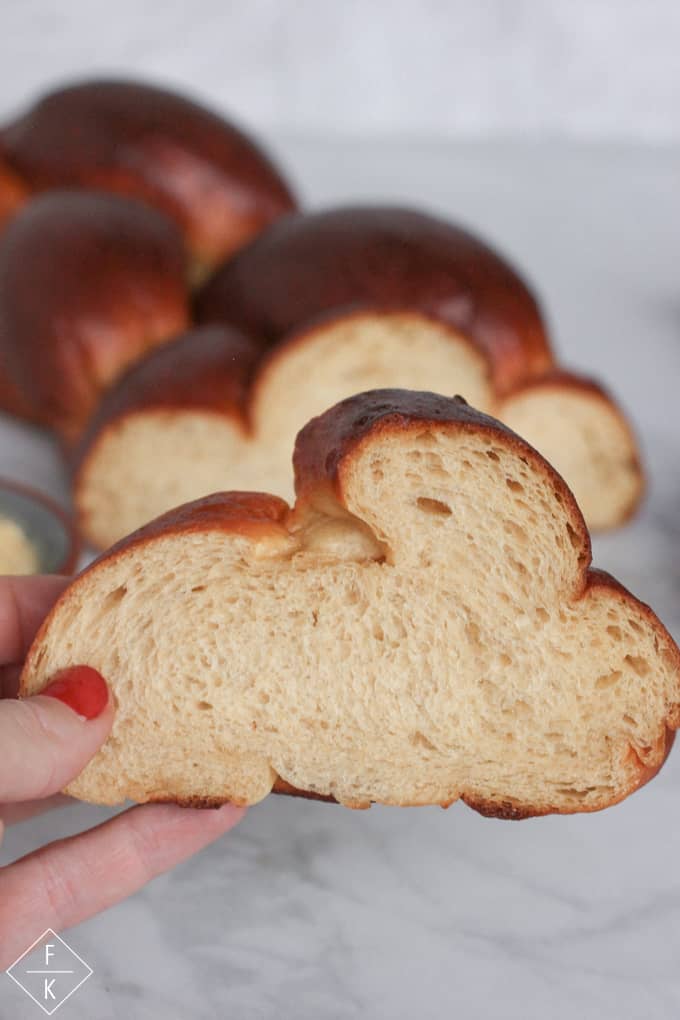
Basic Steps To Make Low Carb Challah Bread:
- Activate Yeast With Water And Sugar (the yeast eats the sugar, so there will be none left in your final dough!)
- Add Eggs, Allulose, And The Low Carb “Flour” Ingredients And Knead With A Dough Hook For 12-15 minutes.
- Add Kosher Salt & Softened Butter To Dough and Knead An Additional 5-8 Minutes ( note * the fats in this recipe are added separate from the rest of the ingredients to allow gluten strands to have a chance to develop properly during kneaded, since fats can hinder gluten development *)
- Remove Dough From Mixer, Shape Into A Ball, And Let The Dough REST/RELAX for 10 Minutes Before shaping (a few hand kneading turns can assist you in shaping the dough ball before resting if needed).
- Divide The Dough Into 4 Equal Pieces. Shape Each Piece Into A 12-14 inch long Strand (like a rope), And Then Make Your Challah Braid.
- Cover Your Challah Braid & Let It Rise On The Counter For 1.5-3 Hours, OR OVERNIGHT in the Refrigerator (8-12 hours).
- Brush Loaf With An Egg Wash & Bake For 25-30 Minutes. Let Cool COMPLETELY Before Cutting Into.
- WOW THE PANTS OFF ANYONE WHO SEES AND TASTES YOUR CHALLAH BREAD LOAF (EVEN BEFORE THEY FIND OUT THAT IT’S NOT FULL OF PESKY CARBS!) 🙂
Since this low carb challah bread recipe is based off my low carb brioche bun recipe and is VERY similar, I didn’t make a separate recipe video for it. Please review the brioche bun recipe below to see how easy this dough can be to made and what it should look like (it looks almost exactly the same except with a slightly more yellow color). Most importantly, the kneading and mixing process is exactly the same as this video. The main difference is slightly different ingredients and obviously that the shaping method is different (dough will be cut into 4 equal portions for the braid). Pay attention to how the dough should LOOK, because it’s pretty much identical.
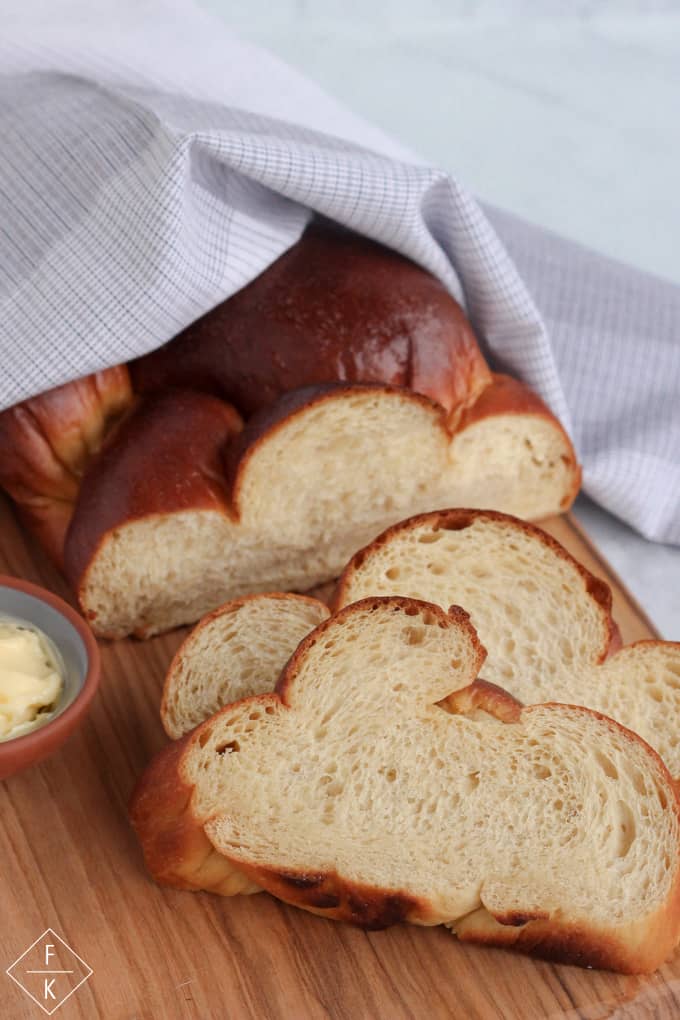
TIPS TO MAKE THE BEST LOW CARB CHALLAH BREAD:
This low carb challah dough is actually quite simple to make when it comes down to it, especially because we can use a stand mixer to do ALL the heavy kneading for us; however, there’s still some specifics to pay close attention to ensure you create the perfect bread! If you’re completely new to bread baking altogether, it can be a bit of a learning curve, but I know YOU can TOTALLY DO IT!! The main reason it can be tricky if you’re new to it, is simply because bread baking is fairly technical, and there is a lot of little variables that can change the outcome of your bread if you don’t know about them (even the weather affects aspects of your bread)! So, I am going to give you as much as information and tips as I can to help make sure your FIRST and future batches will be a GREAT success!!!
1.) USE A KITCHEN SCALE TO MEASURE YOUR INGREDIENTS:
Please, please, please use a kitchen scale in ANY bread recipe – because breadmaking is technical, so precision is imperative here. Changes to the ratio of water to flour in any bread recipe (low carb or NOT) can completely change your final bread (even a small 1-2% changes! ). Let me explain my experience with just this recipe… I adjusted ONLY one ingredient, with a MEAGER 4 grams difference in weight when recipe testing to finally perfect this bread … That little 4 grams (which is the equivalent of less than a tablespoon of this ‘flour’) made only a 1.3% difference in the hydration (which is the water to flour ratio) & resulted in a COMPETELY different low carb challah bread!
Volume measurements just NOT reliable enough because everyone (and and within every batch even) packs the ingredients a little different into their measuring cups! I have made this recipe countless times, and EVERY SINGLE TIME I measure my flours in volume & then ALWAYS verify the correct weight in grams by my scale……AND EVERY. single. time. my ingredients get packed into my measuring cup SLIGHTLY different than the last time (sometimes with up to a 20 gram difference in weight- SERIOUSLY!). SO, USE a kitchen scale to get consistent results and help ensure success with THIS low carb challah bread recipe. PLUS, I won’t be able to troubleshoot or help you if you have any issues if we can’t be exactly sure if the ingredients were measured a little off or not! 🙂
Here’s a link to an affordable kitchen scale with great reviews from Amazon! It goes up to 11 LBS. If you only have HEAVY glass bowls you measure with, you may want a heavier duty one that can handle that added weight like this Nicewell Kitchen Scale (nicewell is KNOWN for their amazing kitchen scales!). It’s double the price, but rightfully so because its crazy precise and holds double the weight load at up to 22 lbs! Personally, I have a heavier duty scale, but I do LOTS of scaled cooking and have heavy glass bowls I use for mixing/measuring. 🙂
If you’ve never used a kitchen scale before to weigh your ingredients, it might sound a little intimidating! But, trust me, it’s easy once you get used to it! The first time I ever used a scale in breadmaking I was super annoyed (I was SO used to volume measurements!). After doing it only ONCE, I learned to LOVE baking in grams instead! Not only does it help you get very consistent results in your recipes, but it also makes it SO freaking easy to halve or double a recipe! There’s no need to try to figure out how many darn 1/2 teaspoons are in a tablespoon to halve or how to double the volume of something that is in a odd volume measurement! It’s way more straight forward – just simply dividing or multiplying the total number of grams of each ingredient (easy PEASY math y’all)!!! I will admit that I do STILL today, like to make my measuring on the scale in grams go quicker THOUGH. SO, to do that I always use the volume measurements in cups ( hence why I listed these all on the recipe!) to help me (AND YOU) measure each ingredient in grams via the scale much quicker if that makes sense! 🙂
Please note, you don’t have to weigh EACH ingredient separately in a new bowl on your scale OR tally up each additional amount to total weight as you add. ALL YOU HAVE TO DO IS use one mixing bowl for all the low carb “flour” ingredients, but hit the ‘TARE’ Or ‘zero’ button AFTER weighing the bowl & then again after each new ingredient addition. This will equalize the current weight of the ingredients on the scale back to Zero, so you’re measuring each additional ingredient individually, but in the same bowl (WHOOHOOOO!!). EVERY kitchen scale has a TARE or ZERO button on it! 🙂
3.) TIME & TEMPERATURES ARE PART OF THE RECIPE (AND EQUALLY AS IMPORTANT AS THE INGREDIENTS!)
Thanks to the amazing teachings of Ken Forkish in his Flour, Water, Salt, Yeast Book and Bonnie Ohara’s Bread Baking For Beginners book, I have finally truly come to understand the full affect of temperature & time in bread making. Time & Temperature are BOTH intertwined, affecting each other as well as affecting your final bread. They affect your bread so much, that both renowned bread baking authors consider time & temperature as PART of the recipe – in the exact same way that ingredients measurements are. We need to be cognizant and diligent with the temperatures of: the water used, the ingredients used (like your flour ingredients), the room (or environment your bread is fermenting/rising in), the actual temperature of the DOUGH, and finally the baking temperature! Time & Temperature are directly correlated here because the COOLER the temperatures, the LONGER the fermentation/rise time will be. And furthermore, the LONGER the fermentation (rise time), the MORE developed and DELICIOUS the flavors usually are in your breads! PHEW.
This is exactly the reason that I use COOLER water in this recipe (cooler being between 70-80F) because that simply means a slightly longer RISE time. This gives this low carb dough BETTER flavor than if you did a quicker rise with warmer water! More on that in a second.
Are you going to need a thermometer for your water? YES! Because dipping your finger in water to see if its slightly warm or not is likely to be up to 30°F off, which could greatly affect your low carb challah dough . Don’t guess– just use a thermometer mmmmkkk? They’re TOTALLY affordable. Here’s a cheapo thermometer from amazon that will do everything you need for this recipe or ANY future bread recipe for that matter!
Now, don’t let this overwhelm you, I’ll cover below the main temperatures and times you need to be aware of FOR this low carb challah recipe (specifically in regards to how this recipe is WRITTEN) below:
- The temperature of your water should be around 80°F – I have used this specific temperature, which is lower than most recipes for a few reasons. First, because we’re using commercial yeast that will be JUST fine using a lower temperature (it’s actually a MYTH that you need 100+degree F water to activate instant yeast!). Second, because we are using a stand mixer, there will be ALOT of friction created in the dough, which will naturally WARM the dough up much more than if you were to hand knead the dough, plus its a LENGTHY kneading time to properly develop the gluten strands in this brioche dough (more time kneading = more friction, which = ultimately a warmer dough). And lastly & MOST IMPORTANTLY, BECAUSE… FLAVOR!!! Cooler temperatures in your dough, WILL mean a longer rise time – and the LONGER the rise time, the MORE amazing your bread will taste (FOR THIS REASON, I have included instructions in THIS recipe for making this an “OVERNIGHT dough” that rises IN THE REFRIDGERATOR. An overnight, “cold fridge rise” or what I like to call a ‘cold ferment’, means you get some SERIOUSLY uhhhmazing yeasty, flavor flavored bread. If you’ve never tried this, then you must try sometime JUST to taste the DIFFERENCE from a quicker rise!!! ) . In general, if you use slightly cooler water or warmer water – than I’ve suggested, it’s NOT going to completely destroy your bread. All that is going to do , is change the RISING time to be either slower (if cooler) or faster (if warmer). The minimum I recommend your water s to to be is 70F (too cold = inactive to start with), and the maximum should be 110F (too hot = inactivated yeast).. these numbers are purely to ensure this yeast is activated and so it doesn’t die. Again, if you don’t have a thermometer to check your water temp, then GET ONE NOW – you can get one on amazon here.
- The temperature of your room & recipe ingredients should ideally be 68-72°F – The temperature of your dough (once all mixed and kneaded together) IS important in breadmaking for many reasons. That being said, the temperature of the room + the ingredients + the friction of the mixer + the temperature of the water (which is cooler IN this recipe) all add up to a final dough temperature. This temperature will change the amount of time it takes your bread to rise AND the optimal flavors, and is the main # we are after and trying to balance with all these termperatures! 🙂 So, be aware of your house temp & ingredients temperature. If ONE of those is a little cooler than average room temperature (68-72), then just increase the temperature of your water a little (ie make your water a little warmer if your room or ingredients are cooler, or make your water a little cooler if your house is warmer, like during the summertime!) to equal out the total temperatures that go into your dough . Does that make sense!? There’s actually equations to figure to THE exact temperature your starting water should be if you want to be a PERFECTIONIST here. Luckily, I’ve already calculated that temperature FOR YOU and that’s how I wrote the recipe as is) DON’T panic if your dough ends up a little cooler or a little warmer , it’s not going to DESTROY your bread as I’ve already said… it will just affect how long it takes to double in size from the yeast when it’s RISING (always REMEMBER faster rise when the final dough is warmer, and longer when it’s cooler) 🙂
- The temperature where your bread is left to rise WILL directly affect the rise time– For this recipe I recommend letting your shaped low carb challah bread rise on the kitchen counter (not in a warm steamy oven or microwave as some recipes request), OR overnight in the refrigerator (as per additional instructions in recipe for this option). This is because the slightly cooler counter temps, will mean a slightly longer rise time than a warm moist closed oven (LONGER rise = better flavor remember!), and the same goes for the overnight fridge (which SERIOUSLY yields the BEST flavor). I purposefully used slightly less yeast in this recipe than I have in the past in my breads, to allow for a COLD slow fridge rise (without overproofing it!). or a longer counter rise. *****The WARMER your rising location, the FASTER your bread will proof remember!!!! But the SLOWER your proofing time, THE BETTER THE YEASTY FLAVOR!***********
3.) DO NOT TRY TO SPEED UP THE PROCESS OR SKIP STEPS.
As I am sure you’ve picked up on in the last section about time and temperature, it is important that you don’t change THE TIME in this recipe by speeding up or skipping steps. That includes the kneading speed, time in your mixer & the rising time!!! Just trust me in that, speeding things up (for example using warmer water), means too quick of a rise. Too quick of a rise is going to result in either an easily over-proofed low carb challah that will deflate after baking…. OR flavorless low carb challah. And you DON’T want EITHER. PATIENCE, My Friend. Even though it’s time consuming waiting for bread to rise, but it’s WORTH the wait. If you need to run errands and won’t be around at the time you would NEED to bake the bread, then JUST pop your dough in the fridge. Putting it at cool temps, just simply slows down the rising process, so you can pull it out onto the counter, bring it to room temperature & THEN resume your rise time as usual!!! 🙂 You can slow the process down (it tastes EVEN better that way) JUST don’t SPEED up the process. Mmmk?
4.) I DO NOT RECOMMEND TRYING TO SUBSTITUTE OTHER BRANDS OR SUBSTITUTIONS OTHER THAN THESE:
I know this is all a lot of information, but sticking to the brands I recommend are probably the MOST IMPORTANT OF ALL!!!!!!!!!! I say that because even my mess ups where I adjusted times, shaping methods, etc. were NOT terrible when I used this very specific mix of ingredients; however, when I used OTHER brands of these ingredients SOME WERE COMPLETELY inedible!!!!! The brands of these specialty ingredients REALLY truly matters here both for taste and especially for texture. Here’s the ONLY brands I recommend you use here!
Vital Wheat Gluten-*THIS POST HAS BEEN UPDATED AS OF 2/10/22 as my former favorite brand of VWG, Hoosier HIll Farms, has been discontinued indefinitely, and I FINALLY found the best replacement as follows. I have tested many brands of Vital Wheat Gluten, and THIS KING ARTHUR BRAND of VITAL WHEAT GLUTEN, is the only one that works PERFECTLY with the ratios in this recipe and has the best taste and texture! As pf right now, it is seriously THE ONLY brand I recommend for Vital Wheat Gluten. All Vital Wheat Gluten’s ARE NOT CREATED EQUAL lol (but seriously!). The thing with other brands is that they all have a very slightly different protein % in them – which GREATLY affects the texture of your bread ( and can result in a RUBBERY texture or an odd aftertaste!). I’ve tested anthony’s brand , bob’s red mill brand, and a few other random brands. I can’t remember and all of them were TERRIBLE. Please don’t try them in this recipe. Try other brands at your own risk, and please note, that all brands have different absorption rates, so you if you are using another brand, you may end up having to adjust the liquid in this recipe if it comes out dry or rubbery!! 🙂
*After Note*- I have had some make this with Anthony’s Vital Wheat Gluten and were happy with it. Personally, I thought the taste, color and texture was insufficient when I used it. If you are used to the taste/grittier texture, then go for it; however, I recommend that at some point you ate least GIVE Hoosier Hill Farms Vital Wheat Gluten a TRY, because in my opinion it is Worlds Different & BETTER!*
Oat Fiber – There are ONLY two brands I recommend you use: THIS LifeSource Brand Oat Fiber 500 (on amazon!) or this Honeyville Brand Oat Fiber direct from their site (which actually is MY first choice Brand, but sadly they have been sold out for almost two months, and are are no longer found on amazon like they used to be! SO sad). Regardless, I frequently use these two brands interchangeably in recipes with very, very little difference The ONLY slight notice anything different other than a slightly whiter color with honeyville brand). I have tried every other brand out there (SO MANY OF THE ONES available on amazon, because that’s amazon ease =LIFE), and NuNaturals and Anthony’s brand oat fibers were THE ABSOLUTE WORST – DO NOT TRY THEM. Trust me. They look dark brown, taste terrible and gritty, and make for some really gross low carb bread that will NOT rise the same or be fluffy or even look anything like mine. Seriously, DO NOT USE THEM. Most of the other brands weren’t as good either. SEriously, HOneyville Or Life Source Brands Oat Fiber are MY # 1 Choice they’re the best, the whitest color, the finest ground, and the best tasting. Enough said.
Lupin Flour – This Lupina Brand Lupin Flour is my #1 and STRONGLY preferred brand. It does not have ANY lingering bitter taste (as many other brands DO!) and is actually lower in calories than other brands (i’m still baffled how THAT even happens when they’re the same weight per serving but I digress). This recipe was actually written for this lupin flour SPECIFICALLY (other brands can change the texture by being MORE absorbent than this brand). The only other lupin flour that could be used instead of Lupina in this recipe is this miracle flour, BUT I am going to warn you, I noticed a very slight bitter flavor with the miracle brand flour. So…. I would ONLY use it as a last resort, if you CANNOT get Lupina Brand. 🙂
Instant Yeast – there’s plenty of brands of instant yeast (aka quick rising or bread machine yeast) that will do a decent job, but I whole-heartedly believe that THIS SAF Instant Yeast is the absolute BEST out there on the market. There’s a reason that every professional bread baker using a commercial yeast chooses the SAF Brand; they are unparalleled when it comes to an AMAZING product you won’t ever be disappointed with. Nope, not sponsered or anything, this is speaking from many years of experience using yeasts myself!!! It is simply THE BEST, and will never let you down. If you are using old yeast (that’s already open), keep in mind that yeast goes bad after 1 month at room temperature and as little as 3 months in the fridge. Mine seems to keep just fine for about 6 months, sealed up tight in my fridge, but it all depends! If you’re using older yeast than that, I suggest you refresh your yeast with a new bag!
KOSHER Salt – Using Kosher Salt is SUPER important in bread baking. My favorite Kosher Salt for Bread Baking is Diamond Crystal Kosher Salt . HANDS DOWN IT IS THE BEST, WHICH IS NO WONDER WHY PROFESSIONALS CHEFS USE IT! Can you use other salts? Sure- you can DO anything you want to (but , please don’t). Are they going to affect your bread? ACTUALLY, YES. Other salts are going to leave you with a bitter aftertaste or a strange flavor, or literally have NO benefit to your bread at all and then what’s the POINT? Kosher Salt is best because “kosher” means it’s undergone intensive cleaning (doesn’t have all the pollution other salts, like sea salts do). You can get larger or smaller granules of Kosher Salt. I recommend LARGER granule, Kosher Salt (kosher BECUASE THIS IS A KOSHER CHALLAH RECIPE) but also because it dissolves slower in your bread which is SO SO MUCH better. If you want to learn more about all the small nuances that come with using other salts in bread READ THIS ARTICLE, FROM THE BREAD GUIDE.
In addition, in case you didn’t know, LARGER granule Kosher salt like Diamond Crystal Kosher Salt , measure QUITE differently than other salts when it comes to volume. Specifically to use the amounts in this recipe for comparison 2 teaspoons of Large Granule Diamond Crystal Kosher Salt is the equivalent weight of 1 teaspoon of fine granule pink Himalayan sea salt. Both weigh 7 grams!
5.) YOU NEED A STANDMIXER WITH A DOUGH HOOK OR A BREAD MACHINE TO KNEAD THIS DOUGH.
This recipe was written and designed for a stand mixer with a dough hook Like This, which seems to be the device the majority of people already have on their kitchen counters!
Can you use a bread machine too?YES! you can use a bread machine to knead the dough. Just make sure you take the dough out after the knead cycle and DO NOT let it go through a first rise before shaping into low carb challah. This dough can only withstand 1 rise (low carb dough just doesn’t have the same qualities as regular flour dough sorry!). As far as recommendations on a knead cycle? I don’t know exactly since I don’t own a bread machine myself! I have had some readers tell me they did a knead cycle that was about 30 minutes long, and then took the dough out right after for shaping (no resting time like this recipe states), and it turned out great!! All bread machines are different though, so if you know your bread machine well, then let it knead away!
Can you hand knead it? YES, you can, with some SERIOUS muscle and skill :). This is a very strong protein bread, and the kneading process is NOT quite the same as with regular bread flour! The dough is a VERY stiff dough AND takes quite some time to knead. Underkneading it, is going to result in a significantly different bread – it will be dense, firm and basically inedible. So, you can hand knead, and I certainly have (actually multiple times just for testing purposes!), but I STRONGLY recommend you do not TRY hand kneading, unless you’re an experienced kneader! Hand kneading will take you 25 – 30 minutes (no joke) to develop the gluten ENOUGH to result in a soft, supple dough, that rises well! If you’re experienced, and know how dough should feel when gluten strands have been properly developed & you can withstand 30 minutes of hand kneading? THEN GO FOR IT! Otherwise, I do NOT recommend. 🙂
Most people seem to have a stand mixer. All you need (or should i say ‘knead’ lol) is a dough hook attachment. My KitchenAid Stand Mixer is SERIOUSLY my FAVORITE machine in the kitchen. If you don’t have one, I HIGHLY recommend a 5 QT KitchenAid Stand Mixer (mine is basically my other child, and I’m completely OBSESSED WITH IT). Then, Grab a cup of coffee, kick your feet up and let that glorious invention of a machine do all your kneading FOR you!

HOW DO I SHAPE MY LOW CARB CHALLAH BREAD?
After letting your kneaded dough relax for 10-15 minutes (no more than this, as it doesn’t actually go through a first rise like real flour dough does!), then cut the dough into 4 EQUAL sized pieces with a bench scraper ( or a knife works too). Then, take each of the 4 pieces and individually shape into strands (like a snake). To do this lightly flatten the dough piece into an oval or rectangular shape. Fold a third of the LONG edge (I like to keep the long edge at the top, ie, parallel to the edge of the counter) of the first piece of dough over onto itself in towards the middle of the dough (kinda like you would fold a letter into thirds, like you were making a “hot dog” fold with the long edge towards the middle of the dough). Press firmly with your fingertips, or with the heel of your hand, to ‘seal’ the dough together then keep rolling the dough up like you’re rolling the long edge of a yoga mat up. Then place your hands in the center of the roughly shaped rope, and roll it back and forth while moving your hands out towards the ends to LENGTHEN the dough ‘rope’. I made mine each about 14 inches long. But you can make them anywhere from 12-15 inches long, depending on how LONG you want your challah bread loaf to be. Keep in mind that when you braid it, the challah loaf will actually be much shorter than the unbraided ropes are. 🙂
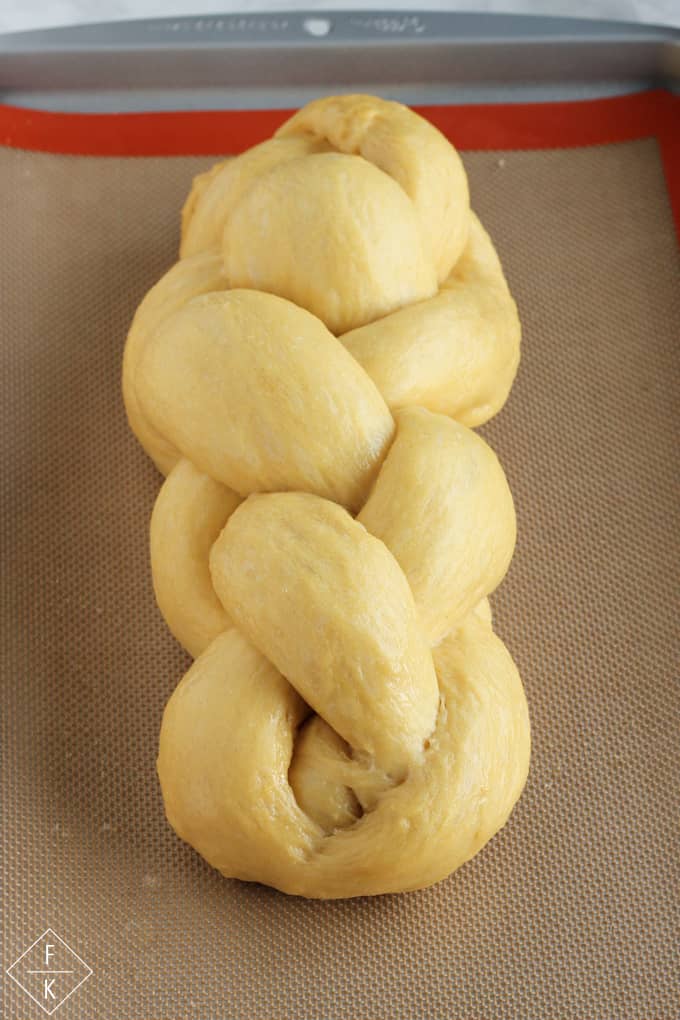
After each rope has been rolled out, I like to pinch the 4 ropes together (pinch that seam well with your fingers, so they stick together) and lay them all on the counter in the shape of a tee-pee, with two ropes in the center and one on each side at 45 degree angle, with the pinched point at the top. Then you take rope on the left (the farthest left rope) and pull it towards the right by going OVER the closest rope, then under the second closest rope, then OVER the fartherst leaving it there. Then take the NEW farthest left rope and do the same thing (over the next closest rope, and then under the next and over the last) and leave it there. Continue doing this with the farthest left rope until you reach the ends of all the ropes. Then you will pinch the very ends together. I like to TUCK each of the pinched points (each end) UNDERNEATH the edges of the loaf).
Here is a quick and EASY Youtube TUTORIAL from Lindsey Stepehens of www.thelindseylife.com on how to do the 4 braided challah strand as I have described above.
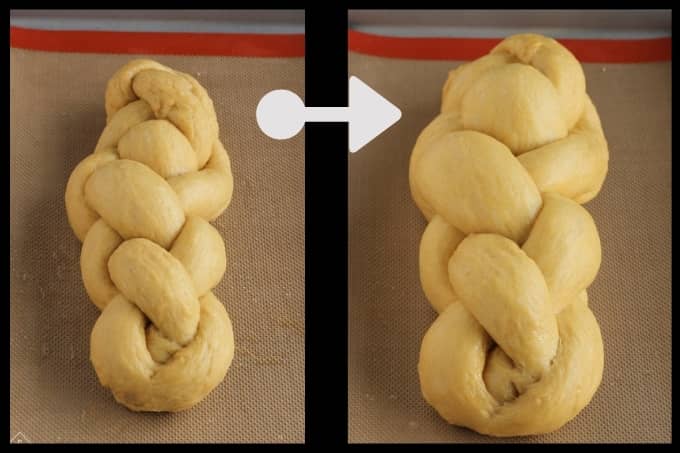
Here’s Photo of the dough about 10 minutes AFTER shaping on the left, to when it is fully risen! It’s hard to tell the size from a photo but its way bigger! All the little wrinkles and imperfections in the ropes smooth out as it expands, so don’t worry about those! 🙂
CAN I MAKE THE DOUGH A DAY AHEAD OF WHEN I NEED TO BAKE IT (AN OVERNIGHT DOUGH)?
YES, YES, YES, (EMPHATICALLY) YES! I designed this recipe to have a low enough amount of yeast, that it’s NOT going to overproof overnight in a refrigerator! The cool temperatures of the refrigerator DO dramatically slow the yeast activity, but they don’t STOP it. A FREEZER will halt your yeast activity, but a fridge just slows it down! So, your bread will continue to rise in the cool temps of your fridge, just at a MUCH slower pace than it would on your countertop. If you were to leave your dough to rise in the fridge for multiple days, it WOULD still overproof (So don’t leave it in there TOO long, just 8-10 hours or so). I think this dough tastes absolutely fantastic (actually ANY dough for that matter) when you a cold fermentation the fridge for 4 or more hours (in bread making, this is called ‘retarding’ the dough). After a cold fridge rise, you will still need to let the dough come to room temperature before baking it. In some cases, you may need to let it rise a little bit more on the counter as it comes to room temperature as well (remember, you want it to be double in size when it’s time to bake it!). Not only is this method super convenient if you need to break up your mixing/shaping time with your rising/baking time but seriously the taste is SOOOOO MUCH BETTER as the yeast has had a chance to REALLY flavor your dough well!!!!! Yum!
If you’d like to let your bread rise in the fridge overnight (or you can also mix in the morning, and rise throughout the work day in the fridge too!), here’s what you’ll do. First following mixing, kneading and resting instructions in the recipe. When you get to the shaping stage, then you will shape challah braid, put it on your greased baking sheet or silpat mat, lightly cover the loaf with greased seran wrap (because you don’t want your dough ALSO tasting like fridge, yuck) and the whole pan with the loaf straight into the fridge instead of letting them do ANY rising on your counter. Leave it in the fridge overnight or until you’re ready to bake (if its shorter or slightly longer that’s fine – just keep it under 24 hours to avoid overproofing), and then proceed to take the pan and dough to & let them come to room temperature on the counter. If they haven’t doubled in size, then let them rise a little longer (depending on how long they were in the fridge they might not need much time on the counter!). Follow with your egg wash and bake as per the recipe!!!
When I cold fermented these in the fridge, I put the shaped Challah in my fridge around 9 PM, let them do a cold rise overnight in there until 8 AM, take it out to sit on my counter at room temperature (70F) for 45-60 minutes until the loaf was doubled in size (from the original start of shaping size & don’t forget your ‘finger poke test’ to double check if the dough has more ‘give’ or not). This was PERFECTLY proofed. ***That being said, if you left them in the fridge for longer than 10-12 hours, you may need even less time for them to rise at room temp after. ***
The flavor enhancement from an overnight rise, will make you happy your let your dough take a chill break 🙂 Think about how awesome this is around the holidays, when you can double task sleeping & making a FANTASTIC LOW CARB CHALLAH at THE SAME TIME! 😉
TROUBLESHOOTING LOW CARB CHALLAH BREAD ISSUES:
My Challah Bread Dough Didn’t Rise at all : Check your yeast! Did you bloom it in water as per the directions before using in the rest of the recipe to TEST that your yeast was active (and it didn’t go bad?)? I specifically call for activating the water with yeast FIRST and separately in the recipe, as an insurance policy! It gives you a chance to ensure your yeast is still good, BEFORE wasting your low carb ingredients making a dough that won’t rise at all because of bad yeast. Was your yeast bag old? An opened bag of Yeast usually is kept best in the freezer for up to 6 months, in the fridge for 3-6 months or in your pantry for no more than a month! Keeping an opened yeast container in your cupboard means it will go bad much quicker, and sometimes it’s possible you simply got a BAD bag of yeast to begin with! Also, what was temperature was your water? If your water was above 110F it was TOO hot and killed your yeast.
My Challah Bread Deflated: The number one reason for deflated brioche is from overproofing! Either your water was TOO warm initially (which casuses the yeast to proof much too quickly), the area where your bread was left to rise was TOO warm (and this makes it rise MUCH quicker), OR you let it rise TOO long. Additionally, if you cut into your bread buns when they were still hot (before letting your dough cool completely) this will ALSO cause deflation. Furthermore, if you didn’t use a scale, used different brands of ingredients than I recommend, etc. then your dough could have actually needed less water (mainly due to your flours being less ‘thirsty’ than mine), which would cause it to puff up too much & then deflate.
My Low Carb Challah Bread Is Rubbery Or Dense & Not Soft: This can be caused by a few things. Most likely, your low carb challah dough was NOT kneaded enough ( my total kneading time is usually 20-22 minutes in my stand mixer) BEFORE you added the oil (or butter) and salt. You need to really develop the gluten with long and SLOW kneading to get that airy soft interior texture. The Other possibility is that your dough DID NOT RISE LONG ENOUGH. If you’ve never made bread before, it can be tough to tell whether it’s RISEN long enough! I prefer to use time as benchmark for the rising time, but rising time DEPENDS SO MUCH on temperatures (please see above in my post lol if you didn’t already), that the rise time can vary on any given day or any given loaf! The BEST way to tell if your dough has risen enough yet is by the size (did it double in size!?) and doing a finger poke test. I describe this method in the instructions on the recipe, but in short, you poke the dough to see how slowly the dough bounces back (if it doesn’t leave a dent that slowly comes back to shape then it is NOT done yet and you need MORE rising time.) Lastly, Did you use a scale to measure your ingredients? If not, it’s possible that you added too much of the low carb flours due to measuring inconsistencies – It’s best to WEIGH your ingredients with a scale for precision! Lastly, did you use a different brand on any of the ingredients I listed in my post above? This would definitely be a culprit as well.
Please don’t hesitate to contact me or leave a comment below the recipe if you have any other issues, questions or concerns!!!
WELLL…… This was certainly the second LONGEST recipe post I’ve written to date…. At least I feel confident that I covered just about EVERYTHING that you need to know, or that could possibly go wrong with This Low Carb Challah Bread (trust me I had multiple fails!)!!! NOW, let’s making some seriously LIFE ALTERING, SOFT, FLUFFY, best low carb bread you’ve ever had, BRIOCHE BUNS!!!!! 🙂
Print
Low Carb Challah Bread With Yeast
- Total Time: 2.5 – 3 hours
- Yield: 14 –16 Thick Slices 1x
Description
A Low Carb Challah Bread made with yeast, that actually resembles REAL bread! All you need is a stand mixer, a dough hook, and an oven to make this delicious and beautiful 4 Strand Braided Loaf! We use a special blend of Vital Wheat Gluten, lupin flour, and Oat Fiber to get a beautiful springy crumb, without all the carbs!
Ingredients
** please use a scale to measure any ingredient with a weight (in grams) to give you the most accurate & BEST results! Measuring in volumes (ie. teaspoons/cups) is ok for the ingredients that dont need to be as precise hence why these are listed in volumes. If the ingredient has grams listed, then PLEASE use a kitchen scale**
- 220 grams (15 Tablespoons) Filtered or Distilled Water (80°F ) *see note 1
- 2 teaspoons Granulated Sugar (or substitute 1 Tablespoon Inulin)
- 2 teaspoons Instant Yeast (strongly recommend this SAF INSTANT YEAST)
- 100 grams (2 large), Eggs room temperature *see note 2 for shortcut!)
- 32 grams (2 large) Egg yolks room temperature (save the egg whites for the egg wash)
- 80 grams Lupin Flour (3/4 Cup) (this LUPINA brand will give you the BEST taste)
- 170 grams Vital Wheat Gluten (1 + 1/4 Cup) (King Arthur Brand Vital Wheat Gluten is the ONLY brand I recommend using)
- 38 grams Oat Fiber (1/2 Cup) (this Lifesource brand or this Honeyville Brand)
- 5 Tablespoons Allulose
- 7 grams Diamond Crystal Kosher Salt (2 teaspoons) *other brands may measure differently, so use a scale!
- 2 Tablespoons of Avocado Oil
For the Egg Wash/Topping:
- Two Egg Whites + 1 Tablespoon Water (use your leftover egg whites from the challah dough)
- Pastry Brush
Instructions
*RECIPE VIDEO for my low carb brioche buns is shown in my above blog post.The mixing & kneading process is the SAME as that recipe video. The way the dough looks is nearly identical as well – although ingredients amounts differ slightly as well as shaping.*
- Mix together your “flour” ingredients (lupin flour, vital wheat gluten, and oat fiber) in a bowl & whisk until evenly distributed. Set aside.
- In your stand mixer bowl, add instant yeast, sugar (or Inulin), and filtered (or distilled) water warmed to 80°F (*see note 1 for water temperature adjustments). To ensure that your yeast is active (& not old or bad), allow the mix to sit for 5-7 minutes until you see foamy bubbles appear (it SHOULD look like the yeast is ‘blooming’’/foaming/expanding slightly in the water). If you don’t see any bubbles, expansion or changes, then your yeast might be bad or old! You will need to replace it.
- Once your yeast is foamy and blooming, add lightly whisked eggs + egg yolks, and allulose to the stand mixer. Using a dough hook, mix together on a low speed until lightly combined. Add half of your low carb “flour” mix and continue kneading on the level 2 (lowest mixing speed) of your mixer for 3-4 minutes. Add the other half of the low carb “flour” mix and continue kneading (still at level 2) for 9-12 more minutes. If the dough is getting too tightly wound around the hook at any point you can stop the mixer pull the dough off the hook, flip it over in the bowl & then resume kneading again. The dough should look cohesive, smooth and stretchy (hello gluten development!) *At this point, if you were to pinch a piece of the dough and try to stretch it away from the rest of the dough, it should NOT break off easily. If it does break off instead of stretch, then it means your gluten hasn’t developed enough, so you can just continue kneading for an additional 1-2 minutes. This dough pinching test, is called a windowpane test.)*. Add Kosher Salt & Avocado Oil to the dough, and knead on low speed until the dough is smooth and the oil has been completely kneaded in (no greasiness should be left in the dough/bowl), which should take 5-8 more minutes of kneading. *If the oil is having trouble getting kneaded in (the dough may slip around kinda crazy the first few minutes while kneading with oil, which is normal and expected!) you can pause the kneading, pull the dough off the hook & then flip the dough over and continue your knead to help distribute the oil in.* Once the dough looks SMOOTH and is not greasy to the touch, turn off your mixer and gather all the dough in your hands (some of your dough may appear stringy or not all in one even ball , and this is okay! It is just tight from good gluten development). Form the dough into a smooth ball shape as best you can. If you can gently knead it on the counter a few times, it will turn into a SUPER smooth ball. Set the dough ball back into the mixer bowl and let the dough rest/RELAX at room temperature for 10-15 minutes (and NO more)!
- After the dough has relaxed for for 10-15 minutes, use a bench scraper (or a knife) to cut the dough into 4 equal pieces (tip: use the scale to weigh & divide by 4 if you want them all exact same size). Now, you can shape your Challah Braid! *watch a how to braid a 4 strand challah loaf video here). TO SHAPE: Take one of your 4 pieces of dough and gently flatten the dough with your hands into a rectangular/oval shape with long edge parallel to you. Pull the Long edge thats farther from you towards the middle of the dough and pinch or seal with your hand then continue rolling the dough into itself forming a log shape. Placing your hands on the middle of the dough log roll it back and forth with your hands moving out towards ends of the rope to create a 12-14 inch long ‘rope’ (mine were around 14 inches!). Do this with each piece of dough. Line up your 4 ropes evenly on the counter and pinch them together at the very top (making a tee-pee shape). Start by picking up the farthest left strand, pulling it towards the rightand weaving it by taking it over the strand second to the left, then under the next strand to the right, and finally over the last strand on the farthest right. Now, using whichever strand is NEWLY placed on the farthest left-repeat the process again (farthest Left strand goes over the strand to the right of it, then under the next one and over then over the farthest right strand). Continue this exact same left to right (over, under, over) set until you reach the bottom of the braid. Pinch the ends of the strands together at the bottom of the braid and tuck both the top end point and bottom end point of the loaf under itself (just an inch or so of each end tucked under the loaf)!
- Gently place your challah braid onto a greased or lined baking sheet (I use a silpat baking mat). Cover the whole baking sheet loosely with a lightly oiled piece of seran wrap or a kitchen towel and let it rise on your kitchen counter for 1.5-2.25 hours or until doubled in size. If your kitchen is a little on the cooler side (below 70-72 °F), your rise time will be slightly longer. If your kitchen is warmer than 72 °F then your rise time will be a little shorter. I actually prefer it to be cooler, because the LONGER the rise time, the BETTER the flavors that develop in your bread loaf! *** ALTERNATIVELY, you can place your shaped challah loaf in the fridge to rise OVERNIGHT (instead of at room temperature) – which will even FURTHER enhance the delicious yeasty flavor! SEE NOTE 3 for tips/instructions for an overnight rise and bake***
- Preheat your oven to 340° F while your dough is rising. You can and *should* conduct a “finger poke” test to check if your dough has risen enough to bake! *To do this, gently poke your dough & see how it bounces back. If it the poke does NOT leave a mark and the dough bounces/springs right back, then it needs MORE time. If the poke leaves a mark but very slowly and slightly starts to bounce back, then it’s perfectly risen and ready to bake. If the poke leaves a big flabby dent that doesn’t bounce back at ALL, then it may have overproofed 🙁
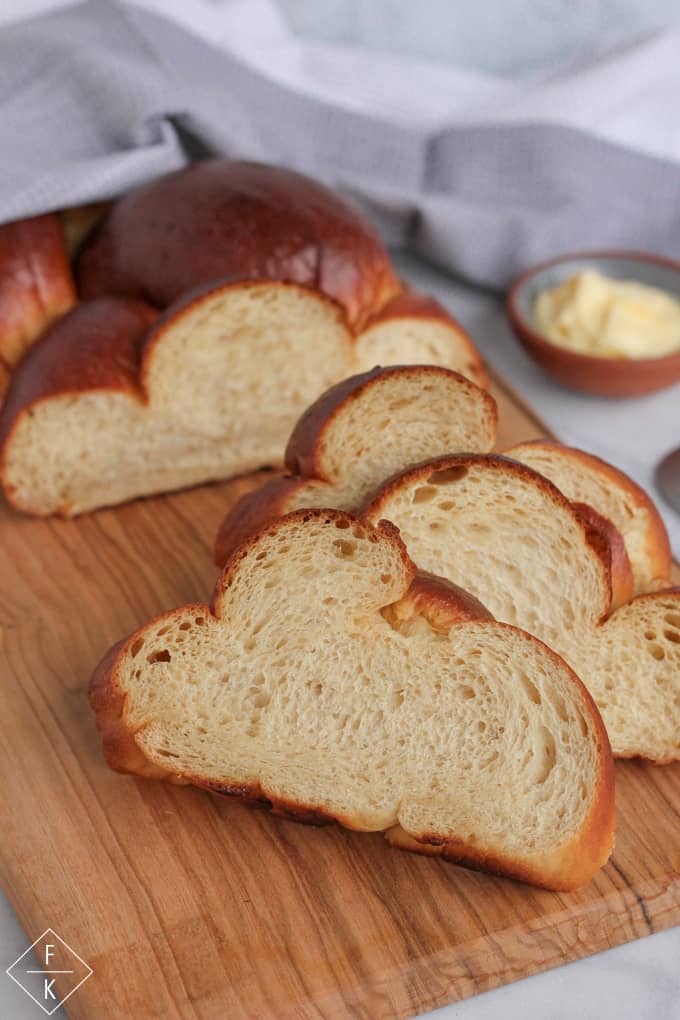
- Whisk together leftover egg whites + 1 tablespoon of water until a few foamy bubbles form to make the egg wash. Use a pastry brush and paint the egg wash onto your challah loaf everywhere but the bottom. Bake at 340 °F for 25-31 minutes until it’s a deep golden brown on top (mine took exactly 30 minutes). Please NOTE, the HEIGHT and Width of your Braid will determine how long this needs to bake in the oven! Mine, was quite large and baked for exactly 30 minutes. If yours is skinnier (please reference the photo in my post of MY risen challah braid), it may need less time, closer to 25 minutes! If it’s getting SUPER dark brown- then it’s getting over done! Let your Low Carb Challah Loaf cool COMPLETELY BEFORE slicing into (cooling it all the way SETS the crumb & prevents deflation- it’s SUPER important!).
- Store your Loaf at room temperature in an airtight container or ziploc bag to prevent drying out. Your baked Challah loaf also FREEZES fantastically! Just Slice before freezing and place in an airtight bag! To thaw frozen slices, remove them from the freezer bag (to prevent sogginess during defrost) and let them thaw on the counter for 30-45 minutes, OR pop them in a toaster! 🙂 ENJOY!
Notes
Note 1: We use a slightly cooler temperature of water here, because the friction caused by a long kneading time in the mixer will be heating the dough up further! You don’t NEED warmer water for instant yeast! Please use thermometer to check your water temperature! Using water that is too warm, will cause your bread to rise quicker – resulting in less flavor & potential overproofing! If you kitchen is REALLY cold (ie. below 70F, you can use slightly warmer water), and if your kitchen is warmer (ie its over 72F in summertime) you can use slightly cooler water (but NO Lower than 70F). See post for more info on WHY! 🙂 In Short, the LONGER it takes your dough to rise, the BETTER it will taste, so cooler water is much much better!
Note 2: If you forget to leave your eggs out to come to room temperature ahead of time, then just submerge them in cup or bowl or warm water for 3 minutes -5 minutes and they’ll be the perfect temperature needed 🙂 (I do this little trick every time, because I am terrible at planning in advance!).
Note 3: FOR A COLD, OVERNIGHT FRIDGE RISE —- Once you have shaped your challah bread, placed it on a lined baking sheet, then you want to cover it with a lightly oiled piece of seran wrap (to keep fridge aromas from settling in!). Before letting your dough rise, put it STRAIGHT into your refrigerator and let it rise SLOWLY overnight (or during the workday if u so wish)! The cool temperatures of the fridge, will still make them rise but at a snails pace. The Cold Temperature will not hurt the yeast, but what it will do is give them amazing flavor!!!! You can also do this if you just want a 3-4 hour (or however long) break in between shaping your buns & baking them. In EITHER case, To Bake,: just take your challah loaf out of the fridge and let it come to room temperature on your counter (this part is important!), for 30-45 minutes. If it has already doubled in size since you initially shaped it, then you can bake immediately. If it hasn’t quite doubled from original size (or a ‘fingerpoke’ test says the dough is still too bouncy and doesn’t leave a market yet), then let them continue rising until they are ready to bake! Don’t forget your egg wash just before going in the oven, and bake as directed! *if you let them rise in the fridge for only a short period time, opposed to overnight, you may need to let them come to room temp for 30-45 minutes and then still continue rising for quite a bit longer. Just watch for over/underproofing signs via the finger poke test listed in the recipe instructions!
Macronutrients on this recipe are calculated based off the brands listed/suggested. Net Carbs are listed, and do NOT include carbs from allulose as they do not affect blood sugar levels. Nor does the net carbs include the sugar that is used to activate yeast, becuase that is JUST food for the yeast! No sugars will be left in the recipe, as the yeast its it ALL up and that’s what makes it RISE! 🙂
- Prep Time: 2 -2.5 hours
- Cook Time: 28-30 minutes
- Category: bread
- Method: Stand Mixer + Baked
Nutrition
- Serving Size: 1 Thick Slice: (1/14th of recipe)
- Calories: 98
- Fat: 3.7 g
- Carbohydrates: 1.78 g NET carbs
- Protein: 12.6 g



I love this bread, thank you for the detailed post!!
★★★★★
Wheat gluten is not OK for celiac or keto. Wish there was a challah without!
There is nothing non-keto about vital wheat gluten. An individual on their keto journey may find it doesn’t work for them, but there’s nothing inherently non-keto about it.
HI Beth! Yes, this is not a gluten-free recipe, nor have I claimed it to technically be keto! It IS very low carb, and DOES NOT kick me out of ketosis or affect my blood glucose levels though. I don’t call the title of the recipe keto, only because some keto folks want to stay away from gluten. I call it low carb. 🙂 because it is VERY low carb!!! in my kexperience you can NOT get a low carb bread like texture like anywhere close to this without gluten, unfortunately! Trust me, I have tried! The BEST keto, low carb yeasted bread that has been created though you can find gnomgnom.com’s site. She has celiac’s and GREAT recipes. If you can’t have gluten then check out her yeasted bread.
Thank you for the detailed recipe and hints. Can’t wait to try it. What is the total carb count please rather than net carb count?
HI Laine! I am sorry I don’t track total carbohydrates so I don’t have those numbers! It would be quite high in this recipe though as it’s packed with fiber!!
I love this and your brioche bun recipe. I really hope you publish loaf bread and pizza dough variations soon.
★★★★★
Dale! So happy you enjoyed it! Last night I finally achieved a CRISPY CRUST!!!!!!!!! that means, those lean doughs like baguettes and pizzas are ON THEIR WAY my friend! I’m testing the pizza dough tonight with my new ingredient added for crisping!!!!! 🙂 This challah makes excellent FANTASTIC french Toast though 😉 ! You can also make this brioche dough in a loaf pan and bake it at a lower temp (350F for 25-30 minutes, and you might need to add foil half way through to lower the browning on exterior). but anywho, more bread variations coming soon!! 🙂
I just found this site after realizing that vital wheat gluten could be used in keto recipes (It’s a true game changer!) I LOVE your recipes and can’t wait to try them all. I used to make challah bread to eat with shakshuka, and I’ve missed it. Now I can have it again! Thanks so much. Looking forward to future posts.
Just wanted to check back in to say that I made this last night/ this morning. It’s fantastic! So yeasty and soft. That said, when I took it out of the oven, it was huge and golden brown. After it cooled, it definitely deflated. I may have overproofed it (I left it in the fridge for 13 hours, then on the counter for 40 minutes to warm). It passed the proof test, but alas…it still might have been too long. Or, the water for my yeast was too warm. I’ll tweak my technique next time.
Also a quick note: I’m in Europe, and many of the brands you mention aren’t available here. For anyone who has access to the German Amazon, here are the brands I used to produce a soft, yeasty, slightly chewy challah bread: Sharkfood’s Weizenkleber (vital wheat gluten) Manako’s Haferfaser (Oat Fiber), and Hoosier Hill Farm’s Sweet Lupin Flour. (Curiously, the Hoosier Hill brand was available for Lupin four, but not vital wheat gluten. The lupin flour is really good with no aftertaste.) Anyway, this recipe is 10/10. I’m so sick of almond flour, and I’m grateful to finally have recipes that taste so real. Thanks!
YAY!!! So glad you liked it! THat yeasty flavor 🙂 You can even use a little less yeast and let it ferment in the fridge for even longer and the flavor will become EVEN better!!!! If you’ve ever had a yeasty pizza crust that has almost nutty, yeasty delicious flavors in it (artisan pizzas or ones IN italy ) those pizza doughs usually use very little yeast and ferment for up to 4 days in the fridge before baking and yummmmmmmmmm they’re SO good that way!!! Breads are the same! Until I MASTER low carb sourdoughs (this is ON MY LIST I PROMISE!) cold fermentation helps me fill the gap with delicious bready flavors!
YAY!!! So happy to hear this Lisa! I have MORE coming too 🙂 I have been AVIDLY working on blending these same low carb flours (and experimenting with some other ingredients like Wheat Protein Isolates, and Casein, and Whey Protein Concentrate) recently to FINALLY make a low carb lean dough that gets CRISPY on the outside!!! Lean doughs are what we need for : Pizza, baguettes, artisan boules, sourdoughs, croissants, ECLAIRS, etc. Last night, i am so excited that I finally got one of three eclair tests to get crispy on the outside!! Which means, the new low carb lean dough testing will commence TODAY! 🙂 I’m thinking pizza crust or baguettes to test this afternoon. Check back soon and I will share asap when I’ve got it down! I also like to share some of my experiments (fails too ha lots of them with breads) on instagram handle fatkitchenblog if you like watching that kind of thing! 🙂
Your entire methodology and drive to perfect and share these recipes makes my heart sing❤️❤️❤️❤️❤️. I’m eagerly awaiting your new recipes, with yeasty, baited breath! Until then, I’ll keep testing your others! You are much appreciated in the low carb world, friend!
First time making challah and it turned out perfectly. I have been Keto for 7 years now and have never had a low carb bread recipe that I am proud to share with others. I followed the recipe to the letter and did the overnight proof in the fridge. This bread will be my go-to for all bread occasions moving forward.
★★★★★
Wow the Brioche buns were amazing! I was looking to make just a loaf of bread using o
Upon flour. Have you perfected one of those? Fingers crossed.
This recipe is amazing! On my first try it came out too dense, I think because I put some ingredients in the wrong order, but still the taste is amazing. I can’t believe it’s 1.78g net carbs!! I love keto but was missing having challah for Shabbat. This is the only low carb bread I’ve ever had that tasted like bread haha. Thank you for your hard work! You should sell this honestly, can’t compare with other breads in the market.
★★★★★
Can i use regular yeast instead of instant?
I’m trying your braided Challah bread. I’ve done things correctly and timely. After the rest periodi removed from bowl. I found the dough sticky. Is this normal.
I measured all ingredients, weighed all. I then shifted the dry dry ingredients as directed.
I have used this recipe twice and both times it turned out great! My family loves it. My daughter adds food coloring to make it more fun! The first time I used Choc Zero keto cookie butter spread in the ropes before braiding them and it made for a great treat!
★★★★★
Hello,
I’m in Canada and can’t get Allulose here. Do you think it would be ok with erythritol or an erythritol monk fruit blend?
Hello,
First of all let me say a big thank you for your efforts to perfect yeast bread recipes for all of us keto followers. There is no way I would be able to follow this diet without having a decent bread substitute – it is an absolute must have for me. Right now I just purchase commercially available bake mixes (there are s couple of good ones) and ready made products (also just a couple of good options), but I would love to go back to breads I loved and sorely miss such as brioche and hala.
I have a question about ingredients in this recipe. The vital gluten from Hoosier farms is no longer offered on Amazon – could you please suggest a suitable substitute?
Same question about the wheat gluten here. I’ve been looking & can’t find it anywhere. (Including Hoosier Hill’s website) I’m dying to try your recipes after reading your post and recognizing that you DEFINITELY speak bread. Help!
Thanks for sharing all of this great info & fantastic looking recipes! Excited to try!
hi there! the recipe looks amazing, do u have a version for us that want to use butter instead of oil? i expect the ratios will change slightly and i cannot just substitute the oil amount for butter and leave the rest of the ingredients the same due to the water content? could u advise please on what are the parts to be changed if i were to substitute oil for butter? and how many grams butter would i have to use?
second question: as this actually contains gluten which is not an issue since i can eat gluten, do u think this brioche could use a sourdough starter discard? since the discard would have had its carbs eaten up by the yeast? just wondering if that would be viable or feasible.
last question, if i wanted to add say 2 tsp of orange blossom water, where would i subtract the liquid from in the recipe? add one less egg yolk for example? or would i increase the dry ingredients?
This Challah is a revelation. First high holidays on Keto and I wasn’t sure what to do and googled and found your recipes. The Chocolate Chip cookies, this bread… I will follow ALL of your recipes because I just can’t get over it. Thank you for introducing me to Lupin Flour! I’ve been eating Lupini beans, and lupini hummus, I wasn’t aware of the flour somehow.
On the recipe – my house was warm and i over-proofed slightly but it was still beautiful and light and tasty. My BF told me “if you hadn’t told me this was low-carb, I’d never have known.”
thank you
★★★★★
I am in Canada and wondering if I could substitute Bochasweet for Allulose as it is not available here?
We have done keto for many years and I will say this is the first time I’ve made a bread and it actually tasted like bread. Soft spongy texture. Oh my word! My world has just opened up. Thank you, thank you for your great detail. I’m a type A person and so I followed along beautifully. The recipe called for avocado oil but in your text it says butter. I used avocado oil. I also have never bought vital wheat gluten and on a whim I decided to make this and only brand I could get from Amazon in one day was Anthony’s. I don’t know what King Arthur taste like but this bread taste delicious. I didn’t have the exact brands that you mentioned and it still turned out great.
The only suggestion I would make is cover it with foil pretty early on because it got dark but needed more time to cook. Definitely don’t put it on a shelf lower because it will burn on the bottom. And I put it in the refrigerator overnight and it had to sit for two hours proofing the next morning. Not sure how you got yours to proof in 30 to 45 minutes. So the key is be patient Outside of that incredible!! I look forward to more new recipes from you!
★★★★★
This loaf just came out of the oven and it’s gorgeous! I really appreciate your very detailed instructions. They were extremely helpful. I did use a kitchen scale. I did not use Lupin flour as I didn’t have any. I had some quinoa flour in the pantry so I used that instead. (Not super low-carb but better than regular wheat flour.) First time ever making a braided challah bread and I’m very pleased! I tried a regular challah bread recipe a couple of weeks ago and loved it. I was so happy to find a low-carb version. I can’t wait until it cools so I can start slicing!
★★★★★
I absolutely love this recipe and make it all the time (in a loaf pan, as we mainly toast it). However, today it sort of collapsed after removing it from the oven. I kneaded 12 minutes on 2, then 8 minutes following the oil. I proofed for 90 min until it was about 1″ above the pan. Generally, I proof overnight in the fridge, but today I proofed in my oven on the Proof setting.. Any idea if this type of collapse is from over kneading, or from proofing too long?
★★★★★
hello
thank you for your very detail post
i am going to try this recipe but would like to use full fat milk instead of water – have you tried this? would you know what adjustments would be needed in terms of the other measurements?
please let me know if you do 🙂
thank you
sarah jane
Hello. I think your bread recipes look amazing and the macros are even better. The problem is the format of the recipe when printing is TERRIBLE! It uses way too many pages and puts the ads that are on the computer on all of the pages. Grrr.