THIS POST MAY CONTAIN AFFILIATE LINKS FOR PRODUCTS THAT I PERSONALLY USE AND RECOMMEND. IF YOU MAKE A PURCHASE THROUGH ONE OF THESE LINKS, I WILL EARN A COMMISSION AT NO EXTRA COST TO YOU.
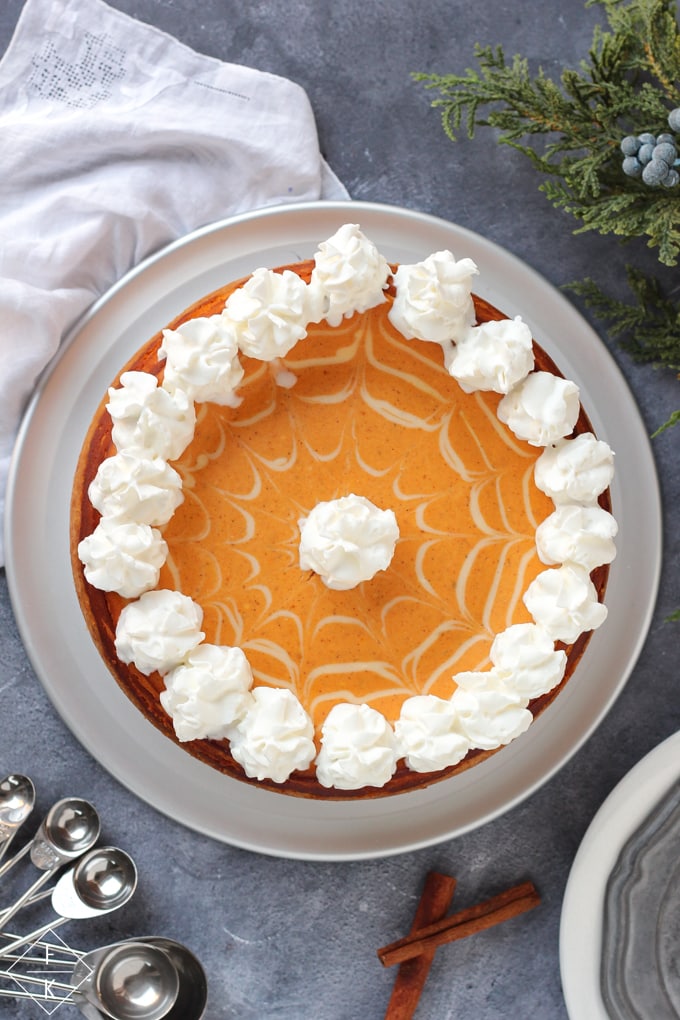
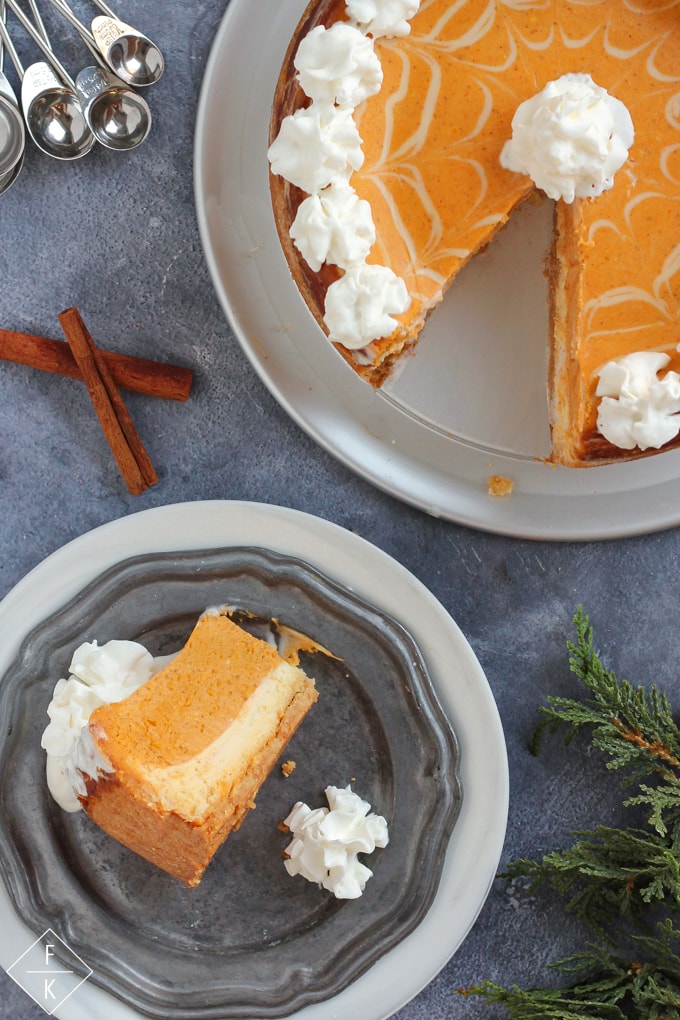
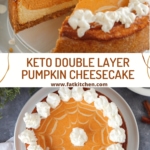
This Keto Layered Pumpkin Cheesecake has double the layers of deliciousness surrounded by a scrumptious brown-butter almond flour crust! One layer is creamy new york style cheesecake and the other layer is pumpkin cheesecake that is so soft and rich, it ACTUALLY tastes like pumpkin Pie! It’s creamy, luscious, and you’d NEVER guess that is sugar-free (nor will your guests!). It’s also gluten-free, LOW carb, and is SURE to keep you on track with your keto diet EVEN on Thanksgiving. In fact, you’ll THINK you’re cheating when you’re eating this!…. If you thought ‘classic’ pumpkin pie was your ride or die thanksgiving dessert, just GIVE THIS IS A TRY and you’ll never look back! 🙂
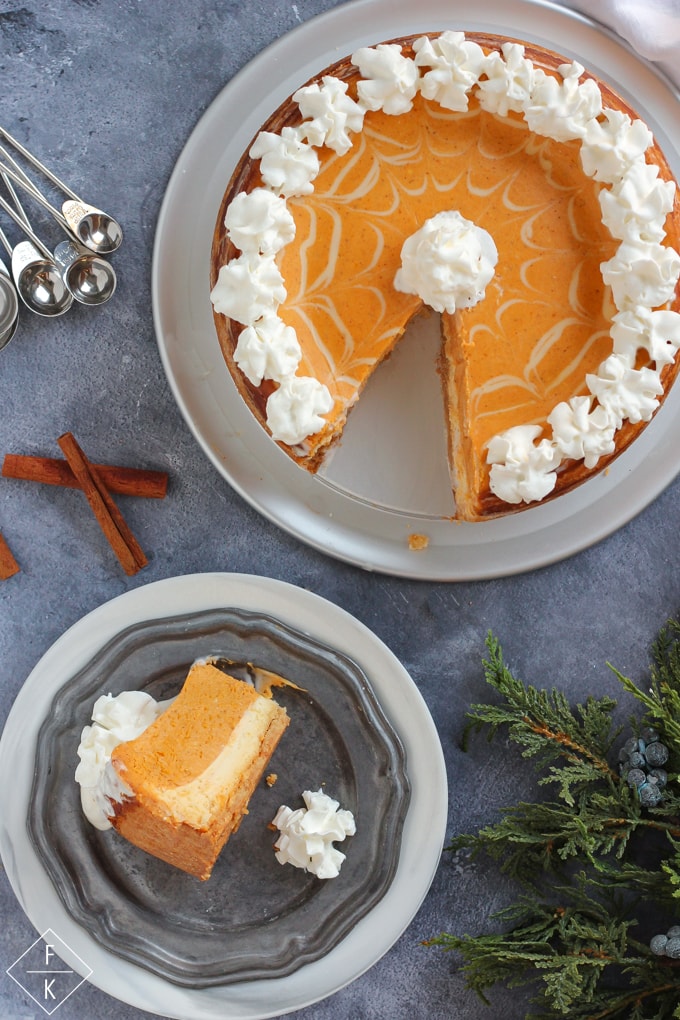
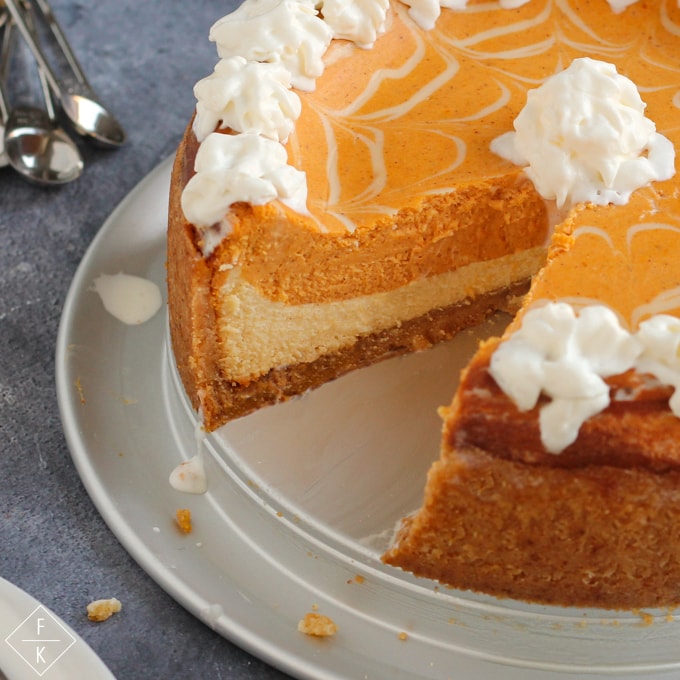
I am going to make this post brief, because thanksgiving 2020 is quickly approaching (NEXT week), and this is one keto recipe you NEED on your thanksgiving table. Not only, because I can SWEAR nobody will even have a clue that it doesn’t have sugar in it, but because it’s wildly addicting and will be the HIT of your thanksgiving desserts!
I need to start by explaining that I am actually a DIE-HARD pumpkin pie fan come thanksgiving. Pumpkin pie has always been the tradition in my house for thanksgiving! I just HAVE to have a thanksgiving pumpkin pie for dessert, and I also HAVE to have it for breakfast the next morning. Ha….But really, I do. It’s been the tradition since I was a kid when my mom would tell me it had “vegetables” in it so it was okay to have for breakfast! LOL. And even through adulthood- the tradition has stuck with me, and pumpkin pie is still my favorite part of thanksgiving, and the morning after 🙂
I never once thought I would be okay without the tradition though, until last year. It sounds dramatic, but no pumpkin pie on thanksgiving would be like no presents on christmas- such A tragedy!!! When I first went keto, almost 3 years ago now, I kept up the tradition of course, and made actually some pretty delicious keto pumpkin pies. My favorite was when I started using just egg yolks instead of whole eggs to give it a creamier more custard like texture (since we’re not using that creamy condensed milk for keto pumpkin pies). The pumpkin pies were tasty, but they still just weren’t quite doing it for me, and I hated the temptation of that sugar-filled pumpkin pie on turkey day (I stay keto ALLLLLL year long without cheats to manage my migraines). My pies were enough to keep me on track, but not enough to keep me from looking longingly at the REAL carby ones with longing in my eyes.
SO…… Last year, I got up the nerve to try something new at the last minute. I had decided I was going to make a double keto dessert all in one pretty little springform pan. One that that tasted like pumpkin pie but had an extra layer of one of my other favorite desserts- cheesecake in it too (DOUBLE WHAMMY!). HOW Can you look longingly at any other dessert, when you have TWO in one keto friendly ones on your plate already – I thought?!
I decided that if I could make the Pumpkin Cheesecake layer ACTUALLY taste just like a creamy pumpkin pie, then I would be less likely to mourn the loss of my beloved traditional pumpkin pie dessert from the table that year….. And the extra layer would also make my family happy because we sure do LOVE us some new york style cheesecake… So, I tried it… and guess what?
….. A NEW TRADITION WAS BORN!!! Because that keto layered pumpkin cheesecake was hands down one of the BEST thanksgiving desserts I have ever had. 100% a NEW favorite (above a traditional pumpkin pie- seriously!!!). Not to mention, the WHOLE family (carb eaters and all) loved it. It exceeded all my expectations and so much more. Plus, I can still eat it for breakfast the morning after thanksgiving, so that part of my tradition is still unchanged, OF COURSE 🙂
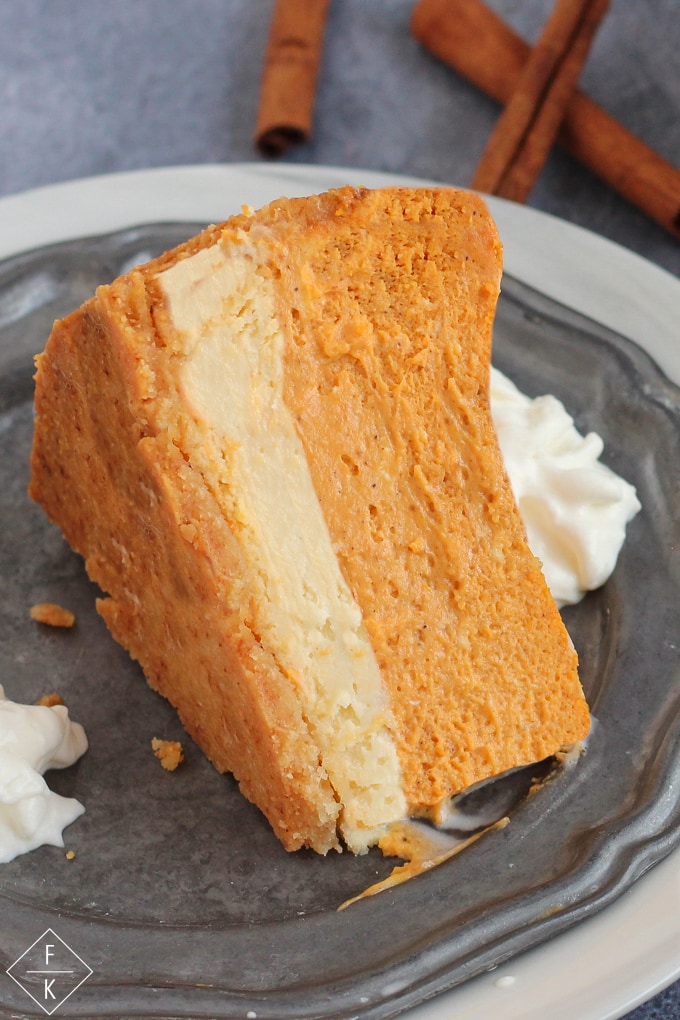
So from here on out, every thanksgiving— THIS IS IT. This keto layered pumpkin cheesecake is MY NEW thanksgiving pumpkin pie–my NEW RIDE OR DIE– my NEW Thanksgiving Dessert Table CONTRIBUTION. I promise with this, you will NOT miss classic pumpkin pie… and you won’t have ANY diet regrets (especially the kind of regrets that come from eating off track on thanksgiving ahem…. ), because this is so good it TASTES like cheating. Not only will it fool yourself into thinking it’s a dirty sugary treat, but it will fool a crowd too 😉 WIN, WIN.
This recipe is pretty straightforward, but I will explain a few details regarding of one of the very important ingredients in this ,and briefly give a few tips for the mixing process and the baking methods!
THE SWEETENERS IN THIS KETO LAYERED PUMPKIN CHEESECAKE:
The Sweeteners I used in this Keto Layered Pumpkin Cheesecake are an IMPORTANT blend of both Allulose AND Erythritol, with the majority of the sweeteners in the pumpkin and cheesecake layers being Allulose! This specific blend is vital to the recipe’s overall texture. Allulose is a rare type of sugar (that doesn’t impact blood glucose, so it is keto & diabetic friendly), and really does act like real sugar! Allulose is what’s responsible for keeping this layered pumpkin cheesecake smooth & creamy, with that NY style texture in the cheesecake and that delcicious custardy texture in the pumpkin, like pumpkin pie.
Erythritol and Monkfruit (commonly used in keto recipes) tend to crystalize after being baked and then cooled, leaving you with a chunky, almost gritty/crunchy texture, when a recipe calls for a big portion of these sweeteners. They also can leave a slight “cooling” sensation in your mouth in certain recipes or when a lot is used.Although, there’s good reason to use these sweeteners in certain things, I don’t like using them in any sauces, syrups, custards, cheesecakes, creme brulee, etc becuase they won’t end up smooth like those recipes are supposed to! The only reason I don’t use ALL allulose in THIS low carb layered pumpkin cheesecake recipe is simply because Allulose isn’t quite AS sweet as regular sugar or other keto sweeteners (it’s actually about 1/3 LESS sweet tasting). So, I like to mix it with just a little bit of another sweetener, like erythritol or monkfruit, to help balance the sweetenness without having to increase the portion of sweeteners in it too much.
I chose to combine erythritol and Allulose here, but you can just as easily substitute the erythritol in this recipe with monkfruit. You are also welcome to use 100% allulose in the cheesecake/pumpkin layer, if you don’t want to blend two sweeteners for the cheesecake layers, just remember to substitute the 3 Tablespoons of erythritol in the recipe with 4 Tablespoons of allulose (since you need more of it!).

This Hoosier Hill Farms Brand is ALL TIME FAVORITE brand of allulose and the only one I use now! As far as I can tell, all brands of allulose seem to function the same (I’ve tried many brands); however, this Hoosier Hill Farms has the FINEST texture of any that I have tried, so I think it performs the BEST, and it’s affordable (it is actually the same price as erythritol is!).
The only thing you can successfully substitute for the allulose here is Xylitol. Xylitol seems to stay fairly smooth like allulose does in recipes (not QUITE as smooth as allulose, but definitely better than monkfruit or erythritol); however, xylitol is highly toxic to pets, so be careful if you have dogs or cats around! I steer CLEAR of xylitol because my two huskies LICK UP every single little grain of food that falls in my house. Besides, I’m super happy with the performance of allulose – big fan! Allulose is what I use in my Smooth Keto Salted Caramel Sauce :), and it’s also my sweetener of choice in low carb breads, like my Low Carb Brioche Buns With Yeast.
The Method/Baking Specifics For This Keto Layered Pumpkin Cheesecake:
This Recipe, is pretty straight forward!!! The only few tidbits you need to know are in regards to the proper order of mixing things, and the baking method that will keep your cheescake from sinking in the middle or cracking on the top after it bakes. 🙂
1.) Mix the eggs in one egg at a time.
I know it sounds silly to have to point this out, but cheesecake and pumpkin pie are BOTH two desserts where it is very important to incorporate one egg at a time, so I felt the need to mention the importance this step becuase this recipe is a combination of BOTH of those! The reason for adding the eggs, one egg at a time is to prevent your mix from “breaking” , which means “seperating“, which is what can happen when the eggs are just all thrown in at once. Doing it one at a time will help ensure your cheesecake and pumpkin cheesecake layers are indeed smooth , creamy and the best consistency. So, this is just your friendly reminder to take it slow, do them one at a time, and you won’t have any issues ! : )
2.) USE A SPRINGFORM PAN!
A springform pan is a MUST for any cheesecake so that you can easily remove it from the pan after it has cooled without destroying it! I used an 8 Inch wide Springform pan on this (because I wanted those beautiful layers to be thick and tall!). This Fat Daddio’s 8X3 Inch springform pan is the exact springform pan I used (and absolutely LOVE) on this keto layered pumpkin cheesecake :

You can see it in the pictures The base is raised in the middle, which makes it look it fancy when you take the springform sides off, so you can serve it right off the base without anyone realizing it’s part of the springform pan!
3.) Bake your cheesecake in a waterbath (or a Bain-Marie):
A Bain-Marie, or a ‘water bath’ is just like it sounds – It’s cooking your dessert while it actually sits in a little pan (like a tub) of hot water in the oven. What this does is distribute the heat evenly to your cheesecake, give you a really smooth texture cheesecake AND it helps prevent sinking or cracking in the top of your Pumpkin cheesecake. Sinking in cracking, is something that happens when your cheesecake cooks too quickly and gets puffy on top, so the water bath and a lower temperature in the oven help prevent that form happening, and keep the cheesecake cooking evenly!
Using a water bath, although may sound intimidating if you’ve never done it, is a MUST MUST MUST in my book when it comes to making perfect cheesecake.
4.) Protect your springform pan in the Water Bath!
There’s three different ways I like to keep my springform pan water tight while it sits in the water bath in the oven (NOBODY wants a soggy wet cheesecake!), and you will need to use ONE of these methods to keep it dry. Even springform pans that claim they don’t leak, actually DO leak water in, when in a water bath (trust me I unfortunately know from experience).
- You can Place your springform pan in a slightly larger pan that fits over the base closely to keep it water tight in the bottom, and then set the second pan in the water. This method doesn’t work with my springform pan, because it has a lip on the edge, but can work with many other springform pans. Here’s a video demonstration:
- You can cover your springform pan with foil. This method I have used many times, and it does work. It is fairly water tight, unless you get a rip in it when wrapping (so i recommend testing it’s water proof abilities BEFORE filling it with your keto layered pumpkin cheesecake)!. I prefer to use two layers personally to ensure it’s sealed up, so that being said you can double this method, with the next
- Use a crockpot Liner (they’re oven safe) like this one AROUND your springform pan as a secondary protection layer! You just put your pan in, and then tie it tight, and THEN add foil around the liner! You can see this method demonstrated WITH THIS LINK To Live Love And Sugar’s Blog. It’s QUITE genius 🙂 I’ve also seen other line with foil, THEN put the liner around the foil. Either way, it helps keep leaks out! 🙂
I know I will certainly be making this Keto Layered Pumpkin Cheesecake next week for Thanksgiving for my family (and FOREVERMORE)!
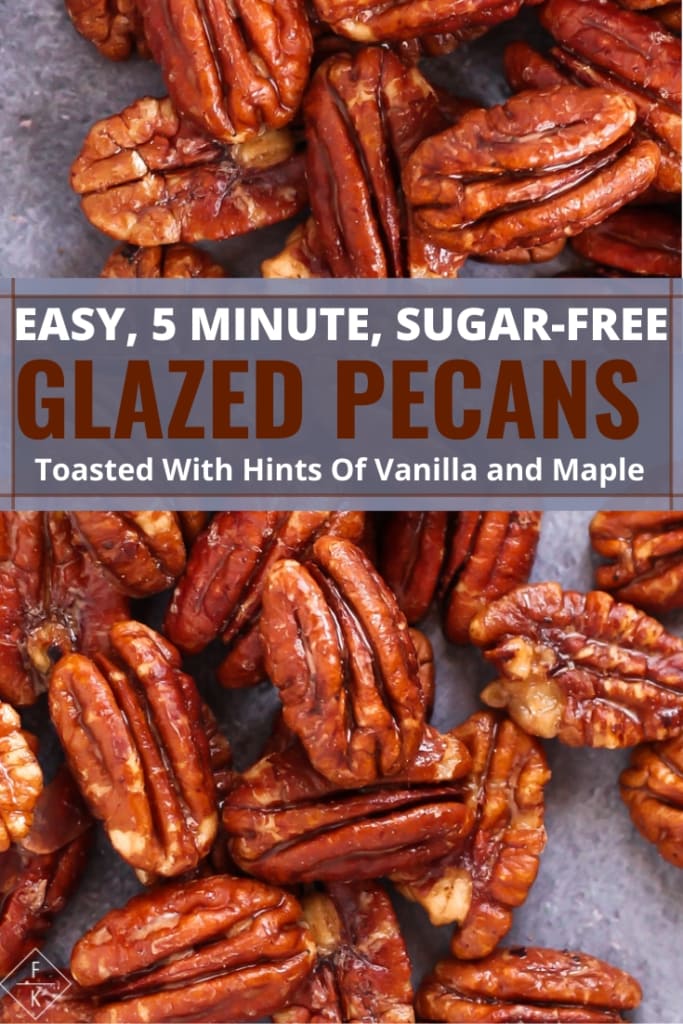
Here’s some Other Keto Thanksgiving Recipe Suggestions that you can find here on this blog! These recipes were all tested at FRIENDSGIVING dinner with about 20 carb-lovin friends who ALL had no clue these were keto recipes 🙂
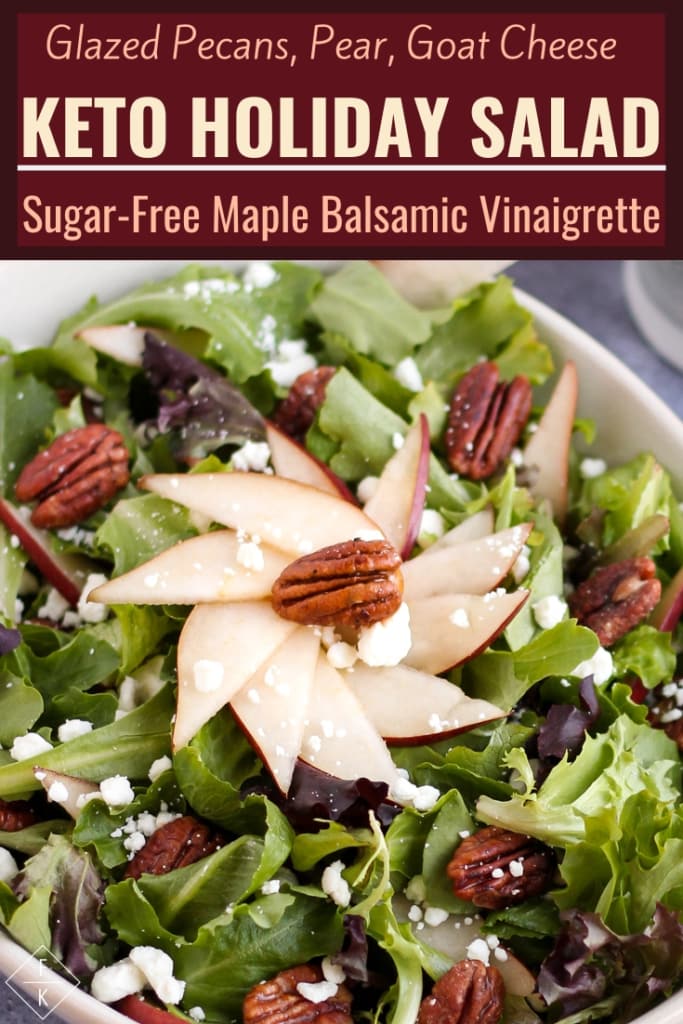
Keto Pecan Salad With Goat Cheese, Pear & Maple Balsamic Vinaigrette:
Happy Keto Turkey Day Y’all!!!! Gobble, Gobble.
Print
Keto Layered Pumpkin Cheesecake
- Total Time: 60-75 minutes
- Yield: 12 1x
Description
Move over Pumpkin Pie, this Keto Layered Pumpkin Cheesecake is going to steal the holiday dessert stage! With a lightly sweet brown butter almond flour crust and TWO layers of creamy NY Style Cheesecake coupled with Pumpkin Cheesecake (that TASTES LIKE PUMPKIN PIE), this dessert will surely fool any carb lover. It’s creamy, smooth, rich and sweet, and by golly it’s All sugar-free, gluten-free AND low carb. This is my forever Thanksgiving dessert.
Ingredients
For the Crust:
- 1.5 Cups Almond Flour (blanched and finely ground- I use Kirkland brand or Anthony’s)
- 6 Tablespoons Butter (salted)
- 4 Tablespoons Erythritol (granular) (or substitute with Monkfruit)
- Large pinch of salt
- Dash of cinnamon (optional)
Cheesecake Layer:
- 3 Packets of Full Fat Cream Cheese (24 oz), softened to room temp
- ¾ Cup + 2 Tablespoons Allulose (Or Substitute with Xylitol)
- 3 Tablespoons Erythritol (or sub with 4 more tablespoons of Allulose)
- 3 Large Eggs, Room Temperature *see Note 1 for quick trick
- ½ Cup Full Fat Sour Cream
- 1 + 1/2 teaspoon vanilla extract
For The Pumpkin Layer (Additions):
- 1 Cup + 1 Tablespoon Canned Pumpkin Puree (NOT pumpkin ‘pie filling’)
- Large Pinch of Salt
- 1/4 teaspoon vanilla extract
- 1 + 1/4 teaspoons pumpkin pie spice
- 3 Tablespoons Allulose (or sub xylitol)
An 8 Inch Spring-Form Pan
Instructions
- Preheat Oven To 350°F. Wrap your Springform Pan (I use an 8 inch Springform Pan) with heavy duty aluminum foil around the outsides so that no water will leak in , in a water bath! Please see note 2 below or read my post with details on how to do this, with additional options you can use! ***I like to wrap the outsides of my pan in foil to waterproof it, then put an oven-safe slow cooker liner under around the edges, tying it in a knot to keep it tight the outside of the pan, just below the top for EXTRA water leakage protecting. details of this method in note 2 below the recipe.
- Make Crust: First, Brown the Butter by Placing Butter into a pan and melt over medium heat. Once melted, allow the butter to continue cooking until it you see tiny brown bits in the pan bottom of the (or little golden brown bits bubbling in the center of the pan). Usually browning butter takes about 2-3 minutes for this to happen and it browns quickly, so keep an constant eye on it. You can ‘check’ for brown bits in the pan by swirling the pan around quickly and looking for golden brown specks. As soon you see some golden browning, then remove from heat ASAP. Drizzle all browned butter on top of the almond flour mix and stir in with a fork until evenly mixed. Spoon the mixture into well greased 8 Inch Springform pan. Press the crust into the bottom and up around the sides. Go up about 2 inches around the sides of the Spring form pan. (I like to use a measuring cup to press down the crust and also pushing it into the edges, which helps with even thickness as well). Use a knife to make the top edges of the crust going UP the sides of the pan even in height if you feel the need to make it extra pretty 😊 Bake in the oven for 8-12 minutes, watching closely. You want it golden but not BROWN. Remove from oven and allow to cool for 10 minutes while you make the filling. Turn the Oven Down to 325°F for the cheesecake.
- Make the Cheesecake Layer using items in “cheesecake ingredients”. First, Add the softened cream cheese, Allulose (¾ Cup + 2 Tablespoons), and the Erythritol (3 Tablespoons) to a mixing bowl and cream together with a stand-mixer or hand-mixer until smooth and fluffy. Add each egg, one at a time, mixing in between each until just smooth. Add Sour Cream and Vanilla Extract (1.5 teaspoons) and mix another 15 seconds , or until smooth (don’t overmix here though!). Scoop out 2 Cups of this cheesecake mixture and pour into your cooled almond flour crust. Smooth the top with a spatula. The rest of the cheesecake mix in the mixing bowl for the next step (making the pumpkin layer!).
- If you want to make a pretty white swirl design in the top of your pumpkin cheesecake, then set aside 3 Tablespoons of the cheesecake mix now in a small ziploc sandwich bag (or piping bag). Now, using the remaining cheesecake mix, we will make the pumpkin cheesecake layer! Add pumpkin puree, the remaining Allulose (3 tablespoons), 1/4 teaspoon vanilla, large pinch of salt, and the pumpkin pie spice to the cheesecake mix and mix on low just until smooth and uniform. Pour the pumpkin cheesecake mix on top of the plain cheesecake layer and smooth the top with a spatula. *If you set aside extra plain cheesecake in the ziploc bag (or piping bag) for a top design then squeeze it to one corner of the bag, snip the tip with some scissors and pipe in on to the top of the pumpkin cheesecake. I made a series of circles , largest near the outside edge to smaller in the center, and then used the tip of a toothpick to drag the white cheesecake from the center out towards the edge or you can do the the outside towards the center. Either way, Make it FUN!
- prepare hot water (or I just use piping hot water from my sink) to make your water bath. Gently place your Springform pan (lined with foil on the outside remember!) into a roasting pan or pan that will fit your springform into it. Pour hot water into the larger pan until it is about 1 inch deep. Place the Entire water bath with Springform pan in it, into your oven (now should be at 325F). Bake for 50-60 minutes, or until the edges start to slightly souffle up (puff) but the center (about 2 inch radius from the center) is still wobbling when jiggled (It will set as it cools). Turn off your oven, crack the oven door open, and allow the cheesecake to cool slowly in the oven with the oven off for 30-60 minutes. Remove from oven, and allow cheesecake pan to cool further on the counter (until cool to the touch), before refrigerating.
- Cover Spring Form Pan with Foil or Seran Wrap and Refridgerate for 4 hours (up to 5 days) before removing Springform sides and serving!
Notes
Note 1: If you forget to leave your eggs out with your cream cheese to come to room temperature, here’s a quick tip! simply set your cold eggs into a cup of warm water for 3 minutes! They will quickly warm to room temperature this way. 🙂
Note 2: You will absolutely need to protect your springform pan with foil on the oustside for water leaking in while baking in the waterbath. Here’s a my personal preferred method is to DOUBLE line my springform Pan with foil and THEN cover it with a crockpot liner tied tight around the outside (below the top) for EXTRA PROTECTION- You can view this method example HERE . Here is a video for another springform waterproofing strategy which works fantastic as well if you have the right sized pan, which includes a springform pan, in a slightly larger pan, set inside an even larger roasting pan with the water bath)!
Net Carbs = 4.91 grams Per serving (serving size = 1/12th of cheesecake AKA a BIG slice!)
*Sugar alcohols from erythritol or allulose not counted in the total net carbs, since they don’t affect blood sugar (they’re 0 net carbs)!
Carb counts vary based on the brands of each item used. My calculations are for the brands listed/suggested.
- Prep Time: 10 minutes
- Cook Time: 50-65 minutes
Nutrition
- Serving Size: 1/12th of Recipe
- Calories: 273
- Fat: 34.8 g
- Carbohydrates: 4.91 g net carbs
- Protein: 10 g



Outstanding! Will def be making again. I added a small handful of roughly chopped toasted pecans to crust – personal preference – but the crust is devine as printed in recipe. I have never been a person who complains about anything being too sweet – you know those who say “Oh, this donut is too sweet for me, I can’t eat it!” ? That has never been me. This layered pumpkin cheescake is spot on ,for me. I swear I could eat the whole thing. Thank you, Charisse (beautiful name!) for creating and for sharing!
★★★★★
This cheesecake was everything it promised and more! Like a few other reviewers, I too added about 1/2 cup chopped Pecans to the crust for some crunch. If I hadn’t added them, this would still be a 5 star recipe for me.l – the crust is excellent! I used allulose as my sweetener throughout the recipe – it was perfect! I’ll be using this recipe again as a base – and either making the plain cheesecake – or the second layer a chocolate layer. Thank you for a new favorite!
★★★★★