THIS POST MAY CONTAIN AFFILIATE LINKS FOR PRODUCTS THAT I PERSONALLY USE AND RECOMMEND. IF YOU MAKE A PURCHASE THROUGH ONE OF THESE LINKS, I WILL EARN A COMMISSION AT NO EXTRA COST TO YOU.
There’s plenty of Almond Flour Shortbread Cookie recipes out there, but none that suggest this small but very special step in the mixing process, which helps them hold together better (a more cohesive dough!), making them much easier to shape! These are my ULTIMATE Almond Flour Keto Shortbread Cookies! Slice the dough, mold the dough (ahem THUMBPRINTS!), Roll and make shapes with cookie cutters, even make them thin and mall like little wafers– you can do it all with this recipe. These Keto Almond Flour Shortbread cookies are so versatile, easy to make, and addicting. Oh, and of course they’re sugar-free & gluten-free too 😉 ! If you’d like to dip yours in sugar-free chocolate like I did, I have also included instructions in my post below on how to make the chocolate dipped side look smooth, shiny, snappy, AND will NOT melt at room temperature (pssst- this trick is called tempering)!
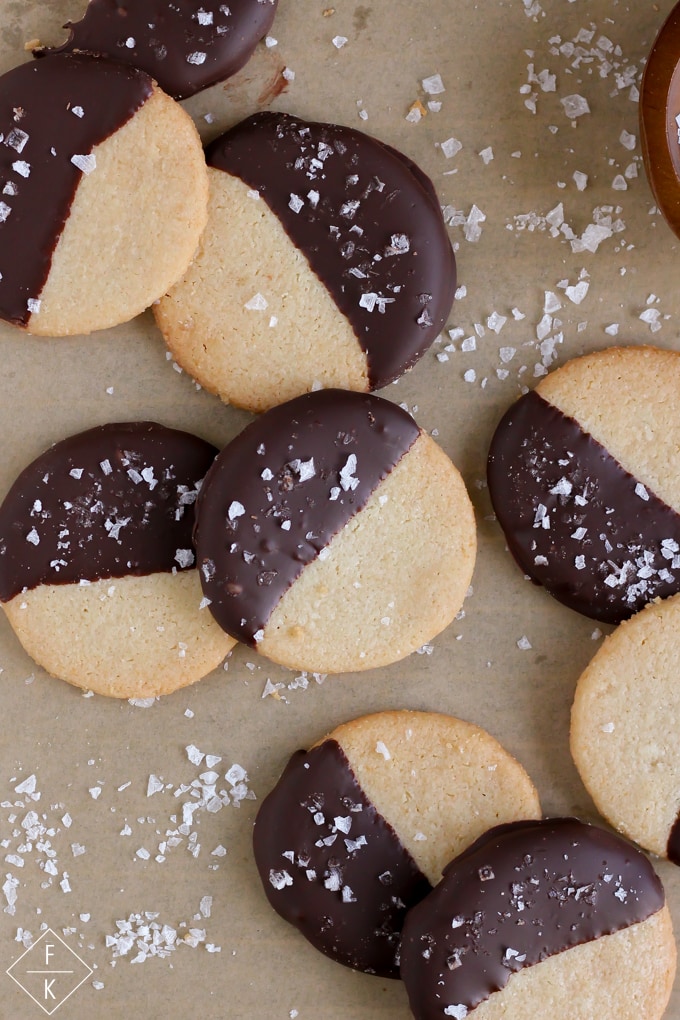
I’ll be the first to admit that the ingredient list, is SUPER basic and nothing too special. If you’re a glass half full kind of a a person, you’re going to say “awesome only a few ingredients to these cookies- this is GREAT”! If you’re a glass half empty kinda person, you’re going to see the ingredients and go, ” ya, ya… big whoop.. there’s a billion other low carb shortbread cookie recipes that are basically the EXACT SAME COMBO- butter, almond flour, salt, sweetener….” Which yes, would be quite true actually, as the ingredients in this recipe are nearly the same others out there; BUT, this recipe IS in fact “SPECIAL“!!!! Rather than different ingredient ratio adjustment, these keto almond flour shortbread cookies have a different PROCESS in HOW you make them & how you bake them! I mean, they do technically vary slightly in the ingredients from other recipes out there, but it’s nothing radical 😉 .
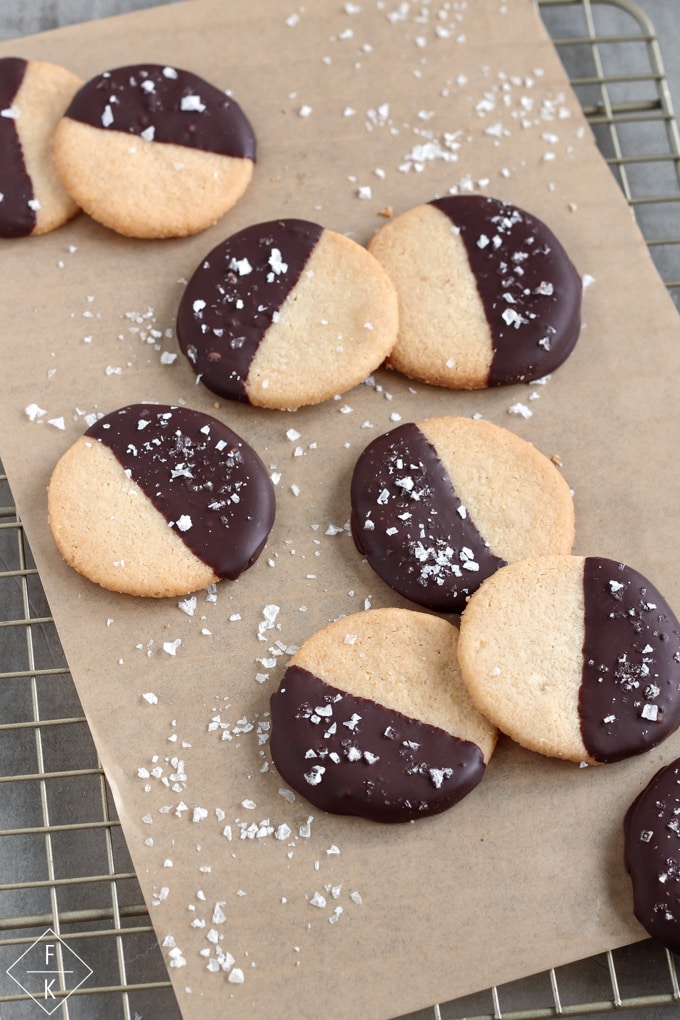
This new process I created of making keto almond flour shortbread cookies actually was inspired by a very common french dessert/breakfast pastry called frangipane (and OMG YUM)! It all started with my recent OBSESSION with french dessert recipes lately….Actually, ANYTHING that ISN’T American has been what’s constantly on my mind and on our PLATES at home. We’re a little over 2 months deep into the COVID-19 Epidemic right now, and here in the state of Oregon, we’ve been on a ‘STAY AT HOME’ order since the middle of March???? ! Since I can’t leave the country, let ALONE leave my HOUSE, I am LIVING for ANYTHING that will ‘transport’ me to another time and place- even if just via my tastebuds & my mind. 🙂 Home quarantine is ..WOOF… a lot tougher than I expected- confined to our little 1900 square foot house, with a 3 year old, no restaurants open, or even a SINGLE trailhead near me where I can ‘get away’ by myself for a few hours, and LOTS of meltdowns (myself included ha!) 🙁 So anywho, amidst my regular worldly daydreaming episodes, I’ve grown obsessed with french treats— mainly FRANGIPANE, marzipan, and ALL things almond paste….. (Don’t worry I’ve been working on new keto recipes using ALL these things as well!)
When I started researching how to make your own homemade marzipan and almond paste (making frangipane tarts was reallly my main end goal which uses almond paste), I realized how EASY these french treats would be to make keto friendly, because they’re all already almond flour based! You make homemade almond paste in a food processor by just processing almond flour with either egg whites and sugar and/or a syrup (like corn syrup- yuck), until it forms a paste (an ‘almond’ paste lol!) .. and that’s it. But what struck me was how SMOOTH the almond paste looked, with a really nice doughy texture. And it dawned on me that my keto shortbread cookie recipe just might truly benefit from utilizing the same process. I’ve made plenty of decent tasting keto shortbread cookies, but none that I felt had a dough that was easy to work with and a cookie that didn’t end up seeming a little grainy without flour. SO… I applied almond paste making method to my Keto Almond Shortbread Cookies AND……. VOILAAAAAAAAAAAAAAAAAAA! This BEAUTIFUL Keto Almond Flour shortbread recipe came to life in an instant. It’s just a basic recipe I’ve used over and over again but NOW with an adjusted process— using a food processor to grind the almond flour into ALMOST a paste, and then I also added one extra step of leaving them to cool in the oven for an overall nice and crispy shortbread!
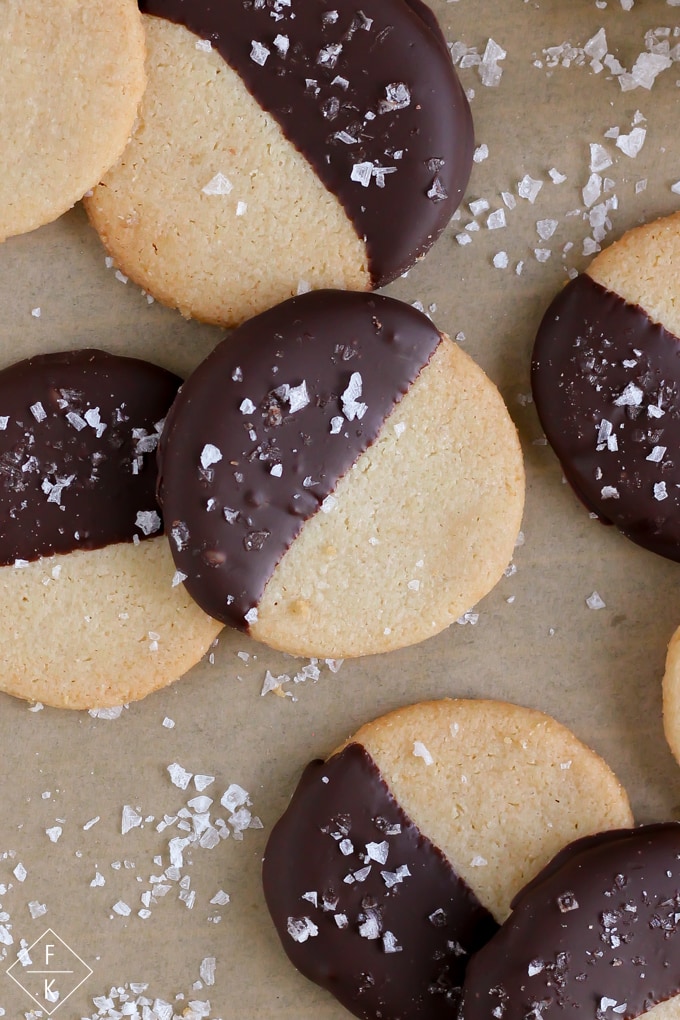
What processing the almond flour in a food processor really does, is just turn the almond flour into a paste (ALMOST like making almond butter, but NOT letting it get that far). It makes the shortbread dough hold together SO MUCH BETTER when you’re forming cookies with it! Once you bake them, they also don’t look as gritty or fall apart as easy- the dough is what I would call more COHESIVE.
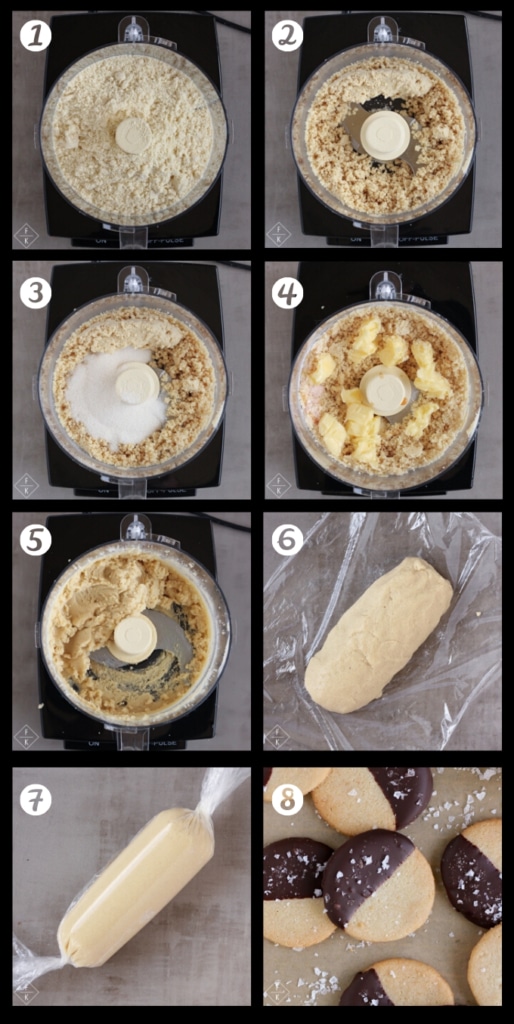
I’ve included pictures of my food processor so you can see what I am talking about while I’m mixing the dough 🙂 PAY close attention to Image 2 ! This is after processing for a quite a few minutes. See how it almost looks like a dough where it’s starting to stick together in a bit of a clumps? THAT’S MY SECRET to this recipe. The ONLY thing in the processor in that photo is almond flour. The flour has just been ground enough to start turning into a doughy type of paste. If you added oil at that point in image 2 and KEPT processing, you’d end up with some smooth blanched homemade almond butter.
This keto almond flour shortbread cookie recipe is SO versatile!
Here’s what you can do with this Keto Shortbread Cookie Dough:
1.) Make ‘Slice and Bake’ Keto Shortbread Cookies! Roll dough into a log, chill it, slice it & bake it. BOOM! This is the easiest, no fuss version and how a lot of traditional shortbread cookies are made. Feel free to add some chopped pecans to the dough right before rolling it into a log and you’ll have just transformed this recipe into Keto Pecan Shortbread Sandies ( I also suggest using Lakanto Gold as the Sweetener to pair with the pecans for this)! Adjust the flavoring however you like in these too- add lemon for lemon shortbread cookies, substitute some vanilla extract with almond extract (this is SERIOUSLY a highly recommended adjustment – it’s DELICIOUS), add vanilla bean flavoring… ?
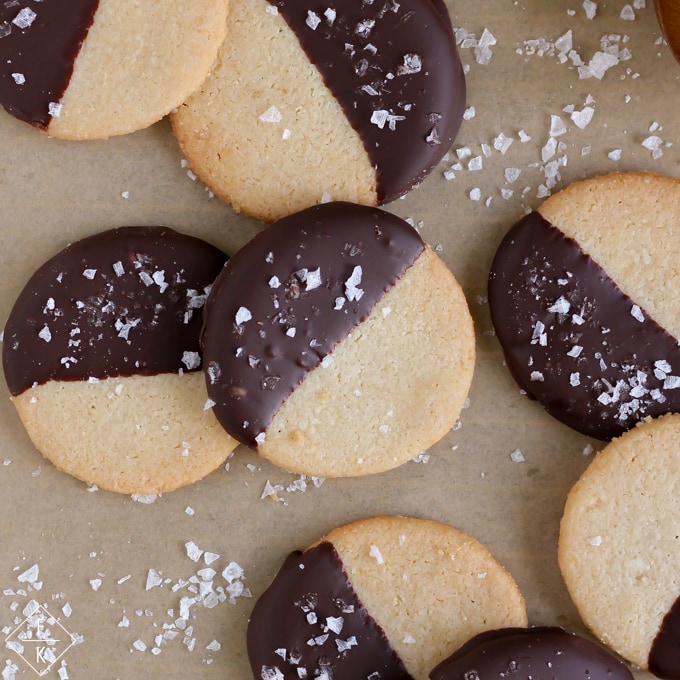
2.) Make Thumbprint Keto Shortbread Cookies! Roll dough into a log, chill it, slice it in thick slices, then shape, and bake! You can either smooth each sliced disc dough piece’s edges with your fingers on your baking sheet and then add a thumbprint in the middle (these are prettier in my opinion ) for fillings, OR you can roll each slice into a ball and then flatten the whole ball with your thumb to make the thumbprint (this causes cracks around the thumbprint though). In either way, you can totally shape the dough pieces on your parchment and bake it right after however you choose to smooth them, roll them, or whatever. You can FILL each thumbprint with sugarfree jam BEFORE baking, or you can bake them as is, and fill the thumbprints after. Fill the indentations with melted chocoloate, peanut butter, or even fill it with my SMOOTH SALTED CARAMEL SAUCE and then top them off with drizzling melted chocolate on top of the whole thumbprint. 🙂
3.) Make ‘Cut-Out’ Keto Shortbread Cookies! Roll/Flatten the dough in a disc shape, refrigerate, roll out dough in between parchment paper, freeze the dough sheet for 10 minutes, and THEN cut out shortbread cookie SHAPES!!!! This is a little trickier, because this dough (although sturdier than if you didn’t process the almond flour into a paste consistency) still doesn’t have ANY gluten to hold it together, so you do have to rely on chilling and flashfreezing the dough if you want to successfully cut and transfer shaped cutouts with it. Sometimes, you need to refreeze while cutting them out as well if you’re not fast enough with the cut
& transfer…. But, nonetheless it IS COMPLETELY possible to make cut out shapes with this dough. In fact, this is EXACTLY how I got my Keto Shortbread Cookies to look so perfectly round and evenly shaped in these pictures (using THIS round cookie cutter!!!) 😉
4.) Make a keto shortbread cookie-like tart crust (like a French Sweet Pastry Crust -a “Pâté Sucrée“)! Shape the Dough into a round disc shape, refriderate, press into a tart pan, and bake! This would be only for a press-in sort of pie crust ( opposed to a rolled one) one that has a no bake filling, or a somewhat shorter baking time (not recommended for pumpkin pie sorts of pies though). Note: I think that if you doubled the recipe and added an egg yolk, it would work be a smidge sturdier for things like this but have yet to test this theory (I will update this ASAP when I do!).
5.) Make this into a Keto Shortbread Base Crust for Keto Dessert Bars! Make double the recipe, Roll into a disc, refrigerate, press into the base of a parchment lined brownie or other square pan, Bake for 8-10 minutes, remove & add your toppings (like cheesecake!) and continue to bake per recipe. The options of things you can do here are limitless. OR You can DEFINITELY bake the crust shortbread crust until just barely golden, let cool in the oven (as per my recipe instructions to crisp it up), and then add ANY NO-BAKE BAR RECIPE YOU WANT on top of the crust!!! 🙂 Seriously ENDLESS OPTIONS WITH THIS ONE!!!
6.)
7.) GET CREATIVE in WHATEVER way you can use Keto Shortbread Dough for! Okay, I’m adding this only because I need to document all the fun things I’m going to do with this keto shortbread cookie dough. I am ABSOLUTELY making these into Keto Samoa Cookies (yep, like the girlscouts ones) using toasted coconut & my SMOOTH SALTED CARAMEL SAUCE (the caramel recipe in this will be cooked to a higher temperature to be less ‘saucey’). Using this shortbread as the cookie base in Keto Twix Candy Bars (this one is already done and photographed, I just need to add on here!), little keto wafer cookie sandwhiches, the crust for a keto French Lemon Tart, keto Frangipane Tarts, Keto Pastry Cream and Fruit tarts, Caramel and Chocolate Ganache tarts, White Chocolate Ganache tarts, Keto S’mores Tart… omg (okay, I’ll stop because my list of ‘tart’ plans RN is actually ENDLESS using THIS recipe as my tart crust base). What else?! TOO MANY THINGS are possible. Use your imagination my friends, and PLEASE let me know what you create! 🙂 (Suggestions and ideas sent my way are always WELCOME too!!!!)
Okay, I’m really getting side-tracked and just started adding a bunch of new ideas to my to make recipes list…. so, I digress.
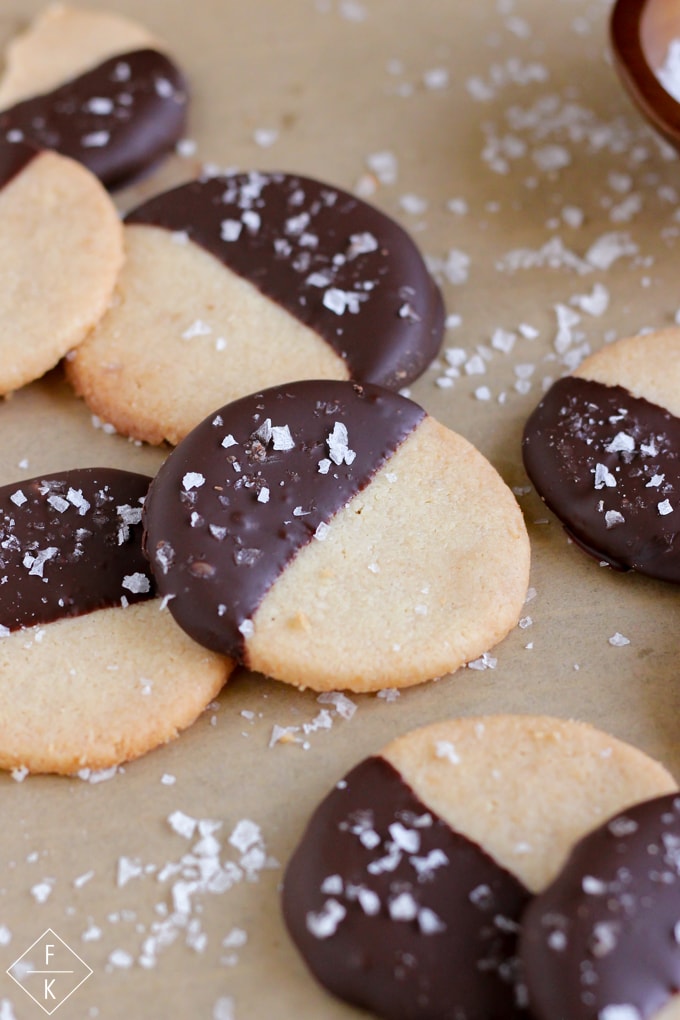
Back To making actual Keto Almond Flour Shortbread Cookies!!! To ensure that these guys are Crispy and hold together very well, you MUST FOLLOW THE INSTRUCTIONS to let these cookies cool in the oven AFTER you’ve turned the oven off. ONce you’re cookies are getting golden around the edges, and that’s the sweet spot for when to to turn the oven heat off, and let them cool in there. The cooling in the oven part is the trick to getting them crispy!!!! So, don’t skip this part 🙂
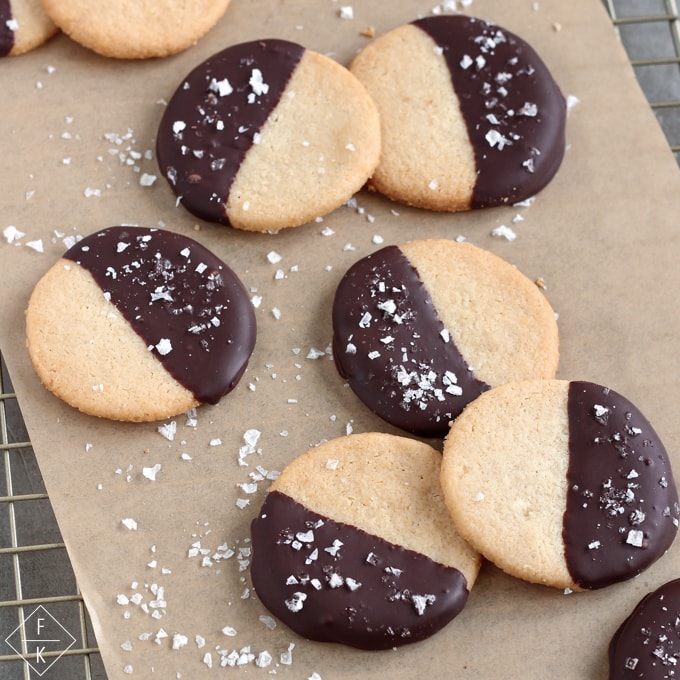
If you want your Keto Almond Flour Shortbread Cookies to be Chocolate Dipped:
Theres a few ways you can go about the sugarfree chocolate coating on your Keto shortbread cookies if you want them this way. There’s an easy way that yields a smooth chocolate coating but it must stay refridgerated until ready to eat, there’s a semi-easy way that you MAY have to refridgerate or MAY look chalky and chunky, and theres a sure fire way thats a little trickier but will make your chocolate coating STABLE at room temperature (meaning, it’s not going to melt into a gooey mess if you leave these on the counter) & will be SURE TO BE SMOOTH, SHINY, AND HAVE A LOVELY SNAP to it when you bite into it . Let me explain a little more…… You can melt the chocolate with a little ADDED coconut oil which yields a SUPER easy to dip, thinned out chocoalate chocolate coating, BUT this what must MUST BE cooled in the refrigerator (coconut oil will make the chocolate NO LONGER possible to be ROOM TEMP STABLE). You can melt the chocolate (either via microwave or double broiler) as is and do a cheap and easy way of ‘tempering’ it, cross your fingers that you guess the temperatures right hope it’s good at room temp and be okay with it NOT being smooth or snappy(make sure you’re OKAY with the possibility of these needed to be refridgerated! ), OR you can PROPERLY TEMPER YOUR CHOCOLATE and KNOW that it will be stable at room temperature snappy, shiny and purrrrty like in my photos 🙂 (Just being REAL HERE, I DID TEMPER MY CHOCOLATE and that’s why the look soo smooth. Any recipe photo that looks that smooth but doesn’t tell you to temper your chocolate is fooooolin you with how yours is going to look mmmkkkk?!? )
Honestly, if you have NO idea what I’m talking about, then you’re better going with option one or two below (1.) with coconut oil & a refridgerator or 2.) without coconut oil, potentially a slightly less smooth chocolate coating, and maybe needing a refridgerator for the chocolate to set (or maybe not)…. In either case, your cookies are still going to be DELISH TASTING, and that’s what matters for most people, so don’t stress about either of these options!! I am going to have to refer to another blogger’s post that shows a really great example of what melted chocolate looks like when it’s not tempered vs. tempered so you can see what I mean (see strawberry picture at the beginning of the post) in visual form.
1.) Chocolate Coating Method 1 – Easy to dip, Easy to coat, easy to melt, and Requires a refrigerator. No tempering required.
Melt your 1 bag of sugar-free chocolate chips (or 2 chopped up Sugar-free chocolate bars) plus 1 teaspoon of coconut oil in the microwave or in a homemade double broiler. If using a microwave, heat in 15 second increments stirring in between each increment until JUST melted (don’t OVERHEAT or the chocolate will seize and get CHUNKY). If using a homemade double broiler (a large glass bowl over a warming sauce pan with 1 inch of water), and melt chocolate in the bowl with 1 tsp of coconut oil over the warming water until smooth and melted. your chocolate is melted, Dip half of each cookie, then place on a parchment lined cookie sheet and place in the fridge to firm. Store these cookies in the fridge until ready to eat (once the chocolate is hardened completely then you can put the transfer cookies to a container together in the fridge) .
2.) Chocolate Coating Method 2 – Easy to do, Easy to melt, yield potentially not as ‘smooth’ or snappy of a chocolate coating, and may need to be refridgerated to harden (but that’s okay if YOU don’t mind that!), but also may (with luck) be just fine!
Set aside 1/4 of your Sugar- Free chocolate chip Bag or 1/4 of your chocolate chunks (if using 2 Sugar-Free Lily’s chocolate bars chopped up). Melt the other 3/4’s of the chocolate in the microwave or in a homemade double broiler (a large glass bowl over a warming sauce pan with 1 inch of water if you don’t have a double broiler pan already) slowly until smooth . Slowly, meaning…If using a microwave, heat in 15 second increments stirring in between each increment until JUST melted (don’t OVERHEAT or the chocolate will seize and get CHUNKY). If using a double broiler just stir constantly while warming over the warming water until it’s just melted. Once your chocolate is melted (in either case) remove from heat, let it cool for a few minutes, then slowly add in the rest of the remaining bits of chocolate a little at a time and stirring constantly after each melts (and continuing this process with the rest of the chocolate) . Once ALL the chocolate is finally melted (may take quite a few minutes, up to 10 minutes!) then you will need to reheat your chocolate ever so slightly (5 seconds in microwave or 5 -10 seconds on double broiler AT A TIME) until it is smooth enough to dip your cookies in. Dip all cookies in chocolate and place each onto a parchment lined cookie sheet and place in the fridge to firm up. You can test one after they’ve cooled by taking out of the fridge and leaving it out to see if it *happened* to get tempered during this process! If it does NOT melt and stays firm out of the fridge, then you’re good to leave these on the counter (THIS MEANS YOU DID ACTUALLY TEMPER IT BY GUESSWORK :)). If it DOES melt out of the fridge, then you will just need to store all your chocolate dipped cookies in the fridge until they’re ready to eat.
3.) Method 3 – Same process as method 2, but you’re monitoring the temperature at different stages to ensure that you’re properly tempering the chocolate! Use a candy thermometor or a chocolate tempering spatula (I got THIS temperature spatula from amazon for cheap and it works PERFECT!).
Set aside 1/4 of your Sugar- Free chocolate chip Bag or 1/4 of your chocolate chunks (if using 2 Sugar-Free Lily’s chocolate bars) . Melt the remaining 3/4’s of your chocolate in a double broiler slowly (can use a homemade double broiler by using a large bowl that fits over the top of Saucepan of 1 inch of warming water on the stove) until melted and it reaches the right temperature ( CORRECT TEMPERATURE HERE for Dark chocolate is 120°F or Milk is 115°F and no higher!). Once melted, remove your bowl (or top pan of a double broiler) from over the warm sauce pan, and let the chocolate cool for a few minutes on the counter. Then slowly add in the remaining chocolate while constantly stirring, until it’s all gone and has all melted with the rest (this process is called seeding and helps cool down the already melted chocolate). Keep stirring and letting all of the chocolate cool until it reaches 82°F for dark chocolate or 80°F for milk chocolate (this stage takes 10 minutes sometimes to cool this low!). Once cooled to the right temperature in this stage, then you’ll need to reheat the chocolate the tiniest bit over the double broiler (or bowl over warmed water) until the chocolate reaches its FINAL “tempered” temperature of 90°F for dark chocolate or 86°F for milk chocolate. NOW you can dip your cookies (QUICKLY) and place on a parchment lined cookie sheet to harden at room temp. You CAN speed up the solidification process by placing your tempered chocolate dipped keto almond shortbread cookies in the fridge to harden quicker if you like. Then you can remove them just after they’ve solidified and they’ll still be solid at room temperature if you tempered your chocolate properly. You can store these cookies at room temperature (this is the best method if you’re sharing these cookies for a holiday or party!) 🙂
PHEWWWWWWWWWWWWWWWWWWWWWWWWWWWW! I didn’t intend on writing up a chocolate tempering guide, but decided I needed to share my knowledge since most blogs don’t talk about how they get their chocolate dipped pictures to be so perfect looking (smooth and SHINY) and NOT look all melty in the photos! The secret is TEMPERING your chocolate. AND NOW YOU KNOW HOW to do this at home yourself!!!! (… add to your list of probably unnecessary life skills learned lol!) 🙂
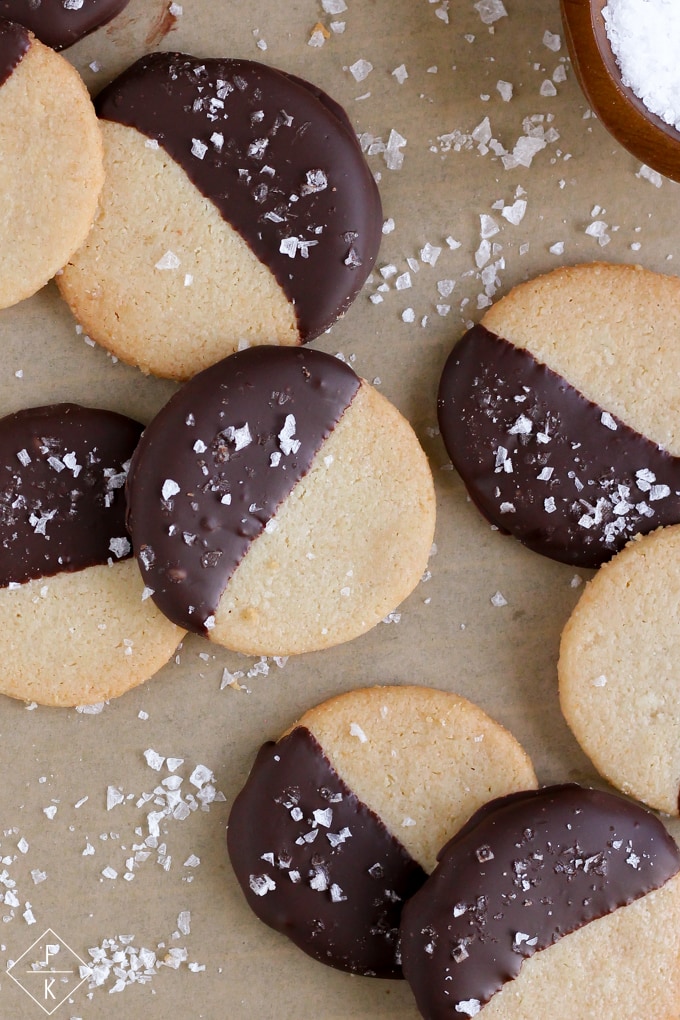
If you make these, PLEASE do share them photos of them with me on Instagram!!! Especially if you use this Keto Almond Flour Shortbread for other creative things (like a bar or tart base yummmmm!). I just love seeing your beautiful and inspiring photos and creations! 🙂 I don’t spend all this time writing up my recipes for $ (seriously, this is JUST MY HOBBY and passion) so the reward for me is knowing you’ve used my recipes and enjoyed all my work! ???? ❤ ???? ❤ ????
Print
Keto Almond Flour Shortbread Cookies
- Total Time: 3 minute
- Yield: Based on Cookie size (nutrition is for 16 undipped cookies)
Description
These Sugar-free Keto Almond Shortbread Cookies use a food processor to hlep make shortbread dough with an optimal ‘doughy’ consistency that make for a smoother, less grainy cookie that holds together better and is very versatile and easy to shape! Cooling them in the oven also helps them get nice and crispy!
Ingredients
- 1.25 Cups Almond Flour (Anthony’s or Kirkland Brand are the finest grain & lowest carbs)
- 1/4 Cup Granulated Erythritol Or Monkfruit
- 1/4 teaspoon salt
- 1/4 teaspoon of vanilla extract (or sub almond extract! Yum)
- 3 Tablespoons Butter (I use salted for extra saltiness!), softened (NOT melted) * see note 1
Optional:
- 1 Bag of Sugar-Free Lily’s Dark Chocolate Chips Or 2 Lily’s Chocolate Bars chopped (Dark Chocolate Bars or Milk Chocolate Bars)
- Maldon Sea Salt Flakes (Optional & you may want to use unsalted butter in the cookies if you’re going add salt to chocolate coating)
- 1 teaspoon coconut oil (optional see post notes for this)
Instructions
- Put Almond Flour in a Food Processor and Process until it *ALMOST* turns into a paste, about 2-3 minutes (see process photos in post for reference- and SEE PHOTO 2), stopping once or twice during processing to scrape the sides of the food processor for uniformity. The almond flour should be ground enough that pinching it with your fingers should make it stick together like a dough, and it should look chunky and almost like it’s turning into a dough already (if you processed it TOO much it will turn into almond butter !). Add in sweetener, salt, and extract and pulse once to process together blend quickly and briefly. Add in your softened butter in rough chunks over the mix. Pulse the dough just a few times until you have cohesive dough ball (careful not to overprocess here either or the heat from processor friction will melt your butter and your dough will be too soft).
- Gather dough ball and place onto seran wrap on your counter and shape into a 1.5 inch -ish round log (see process photo in post). Wrap each end of the log tightly and twist the seran wrap ends up. Refrigerate for at least 2 hours, up to 2 days.
- Preheat Oven to 325°F.
- Unwrap your refrigerated dough. Slice dough with a sharp knife to desired cookie thickness (1/4 inch to 1/2 inch) and place onto parchment lined cookie sheet. Now, you can bake as is, or if you want a smoother cookie (like in my photos), you can VERY gently press the dough down with your fingers and smooth the edges of each cookie (highly recommend!). Aim for keeping a uniform thickness though! You can also press down and smooth each piece with your fingers, and then use a round cookie cutter to slide over the edges and around them to shape even more perfectly (yes I’m crazy like this). Or if you really want to get wild, you can pop sheet in the freezer for 15 minutes and then cut out with a round cookie cutter, remove any edges of dough, reroll excess dough (and then re-refrigerate that dough and restart this process with extra).
- Bake Cookies for 8-11 minutes (depending on thickness) or until they are start turning golden brown at the edges (if they ARE NOT turning golden at the edges yet, then they are NOT done!). These cookies brown quickly so KEEP a close eye on them after 8 minutes. A thicker cookie will need more time. Once these cookies just start browning at the edges, then turn off the oven. LEAVE the cookie tray in the off oven, with the oven door cracked and let them cool for 10-15 minutes before removing the tray from the oven (THIS IS IMPORTANT AND HELPS THEM CRISP UP!).
- If you want to coat these in chocolate- READ end of my post for three methods to do this 🙂 If you want to temper your chocolate so these chocolate coated shortbread cookies are room temp stable and shiny like mine, that method is listed TOO! 🙂 But no chocolate is required for these to be delicious!
Notes
Note 1: If you don’t have any softened butter ready, then measure the cold butter needed, cut it into small cubes, and let it sit on the counter for 15 minutes (this will soften it enough!). I don’t recommend attempting to soften in the microwave, because even 10 seconds of microwaving will melt the butter too much.
Net Carbs = .94 Grams Per Cookie (Yield was 16 cookies)) NUTRITION INFO IS BEFORE CHOCOLATE COATING! You will need to add the amount of chocolate you use and divide by the number of cookies to adjust macros if you choose to chocolate coat these! 🙂
*Sugar alcohols from erythritol are not counted in total net carbs, since they don’t affect blood sugar (they’re 0 net carbs)!
Carb counts vary based on the brands of each item used. My calculations are for the brands listed/suggested.
- Prep Time: 2 hours (passive)
- Cook Time: 8-10 minutes
Nutrition
- Serving Size: 1 Cookie WITHOUT chocolate coating (yield varies based on cookie size)
- Calories: 71.88
- Fat: 6.44 g
- Carbohydrates: .94 g NET carbs
- Protein: 1.88 g


Like!! Great article post.Really thank you! Really Cool.
★
Thank you ever so for you article post.
★
I really like and appreciate your blog post.
★
Thanks for fantastic info I was looking for this info for my mission.
★
Your site is very helpful. Many thanks for sharing!
★
Grc Ocean Global Change Biology Jolly Grant Medical College Vacancy
Here is my web-site … pdf (https://nasahubblebirthday.blogspot.com/)
★★★★★
fbyejonhy gkgmj vkszoxk itiq ddzmseuqrbbkfiy
I had been honored to obtain a call from a friend as he discovered the key guidelines shared on the website.
Having read this I thought it was extremely enlightening. I appreciate you finding the time and effort to put this information together. I once again find myself personally spending way too much time both reading and commenting. But so what, it was still worth it!
Thanks for sharing! These were so therapeutic to make. I really enjoyed getting out a couple of kitchen appliances I haven’t used in awhile on a rainy day and cooking them up. Added the almond extract and a few sliced almonds to the top to add some more keto yumminess. This made me wonder about tweaking your recipe for biscotti. Have you tried doing that with it?
★★★★★
I’m going to try this. I have a question about chocolate though. My husband likes “hard” fudge that’s traditionally made with granulated sugar and cocoa powder. Can I get a similar hard “snappy” chocolate fudge result if I temper the chocolatelike you suggest it is there another method for hard keto fudge?
Seriously awesome recipe! I subbed the butter for Dr. Bronner’s Regenerative Coconut Oil, and they turned out perfectly crisp and delightful.
★★★★★
if you have left over tempered chocolate and want to reuse later (for another batch of cookies), do you have to do the whole tempering process from scratch again? or can u slowly remelt over double boiler?